SVN 1.8.x 服务器安装
2014-12-20 SVN##一、 SVN 服务器下载、安装
###1. 关于 Subversion 1.8.11 Apache Subversion 1.8.11 发布说明
http://mail-archives.apache.org/mod_mbox/subversion-dev/201412.mbox/%[email protected]%3E
###2. 兼容性问题 Apache Subversion 1.8.x 兼容性说明
##一、 SVN 服务器下载、安装
###1. 关于 Subversion 1.8.11 Apache Subversion 1.8.11 发布说明
http://mail-archives.apache.org/mod_mbox/subversion-dev/201412.mbox/%[email protected]%3E
###2. 兼容性问题 Apache Subversion 1.8.x 兼容性说明
##Activiti 5.17.0
Activiti 5.17.0 发布 (2014-12-18),此版本值得关注的亮点:
##下载和安装
###activiti下载:
本例子版本:activiti-5.16.4.zip
http://www.activiti.org/download.html
###JDK 下载 JDK 6+
本例子版本:jdk7
http://www.oracle.com/technetwork/java/javase/downloads/index.htm
之前一直是在 GitHub 上写开源书(见:http://www.waylau.com/books/)但,由于 GitHub 本身的目录结构并不一定符合阅读的习惯,而且没有提供 pdf , ePUB, MOBI 等格式的转换下载。很多同学也还是习惯离线看文档。GitBook 就是解决这一问题。
GitBook 让你在保持在 GitHub 的书写习惯外,稍加配置,就能自动发布到GitBook 上,形成界面漂亮的电子书了(支持 html, pdf , ePUB, MOBI 等)。
GitBook 让你在保持 使用 Markdown 的书写习惯外,稍加配置,就能自动发布到 GitBook 上,形成界面漂亮的各种电子书了(支持 html, pdf , ePUB, MOBI 等)。
##Installation 安装
gitbook 的安装需要 Nodejs,下载地址为 http://nodejs.cn/download/
gitbook 1.x 时执行:
$ npm install gitbook -g
而从 gitbook 2.x 开始,执行下面新的命令语句:
$ npm install gitbook-cli -g
##Usage 1 用法一 使用模板快速开始
https://github.com/waylau/gitbook 这是个快速开始 GitBook 的模板项目,根据项目的结构,稍作修改,就能生成自己的电子书。
###Checkout the repository 检出模板项目
$ git clone https://github.com/waylau/gitbook.git
##问题:执行 jar 找不到依赖的类
用 Maven 编译完成后 ,生产了 ui-compressor-1.0.0.jar
, 此时执行
java -cp target/ui-compressor-1.0.0.jar com.waylau.uicompressor.App
提示下面找不到依赖的包:
Exception in thread "main" java.lang.NoClassDefFoundError: org/mozilla/javascrip
t/ErrorReporter
at java.lang.Class.getDeclaredMethods0(Native Method)
at java.lang.Class.privateGetDeclaredMethods(Class.java:2442)
at java.lang.Class.getMethod0(Class.java:2685)
at java.lang.Class.getMethod(Class.java:1620)
at sun.launcher.LauncherHelper.getMainMethod(LauncherHelper.java:492)
at sun.launcher.LauncherHelper.checkAndLoadMain(LauncherHelper.java:484)
Caused by: java.lang.ClassNotFoundException: org.mozilla.javascript.ErrorReporte
r
at java.net.URLClassLoader$1.run(URLClassLoader.java:366)
at java.net.URLClassLoader$1.run(URLClassLoader.java:355)
at java.security.AccessController.doPrivileged(Native Method)
at java.net.URLClassLoader.findClass(URLClassLoader.java:354)
at java.lang.ClassLoader.loadClass(ClassLoader.java:423)
at sun.misc.Launcher$AppClassLoader.loadClass(Launcher.java:308)
at java.lang.ClassLoader.loadClass(ClassLoader.java:356)
... 6 more
A theme for Jekyll to build a personal blog. Seehttps://github.com/waylau/jekyll-theme-blog
##Screenshots
##Demo
You can see the theme running on my blog.
本文介绍了如何通过 Jersey 框架优美的在 Java 实现了 REST 的 API。CRUD 的 操作存储在 MySQL 中
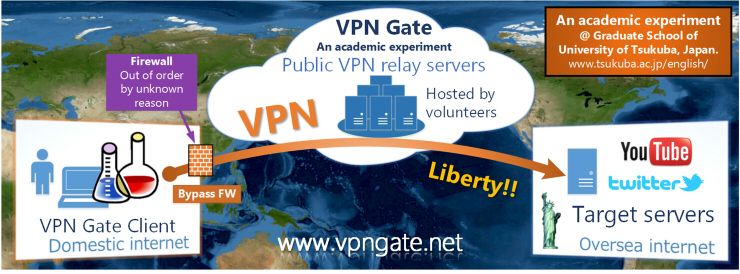
之前介绍了《用 VPN Gate 翻墙科学上网》,通过安装客户端,方便实现 VPN 的连接。如果 你爱折腾,也可以手动设置 VPN 。这样的连接 更加稳定。
##中国行政区划(administrative division)
分为几个级别(government level/level);宪法(Constitution)规定了三个级别(de jure level),但实际上有五个级别(de facto level/practical level)——33个省级(province/province-level region/province-level division)、333个地区级(prefecture/prefecture-level region/prefecture-level division/second-level division)【非宪法区划】、2862个县级(county/county-level region/county-level division)、41636个乡级(township/township-level region/township-level division)及无数村级(village/village-level region/village-level division)【非宪法区划】行政区。各个级别又有不同名称,下面加以详细讨论【具体数字以2005年统计数据为准】。
这个示例应用程序展示了如何使用 WebSocket, Golang 和 jQuery 创建一个简单的web聊天应用程序。这个示例的源代码在 https://github.com/waylau/goChat 。
HTML5 在 web 页面使用 video 元素呈现视频。但 HTML5 视频并不是最终的解决方案,它不能在所有的浏览器工作。你知道 HTML5 视频真的在网上工作吗? 你担心 HMTL5 视频兼容性吗? 看看这篇文章的建议和解决方案如何最大化 HMTL5 视频兼容性。
HTML5 的到来之前,每个视频的播放都需要通过 web 浏览器中通过第三方浏览器插件。最初我们亲眼目睹 RealPlayer,接着是 Windows Media Player 和 QuickTime, 现在是 Flash,这是目前主导的插件,播放大量的网络视频。
摘自《周鸿祎自述:我的互联网方法论》
近期发现用 Help & Manual 5 来写帮助文档导航生成失败,
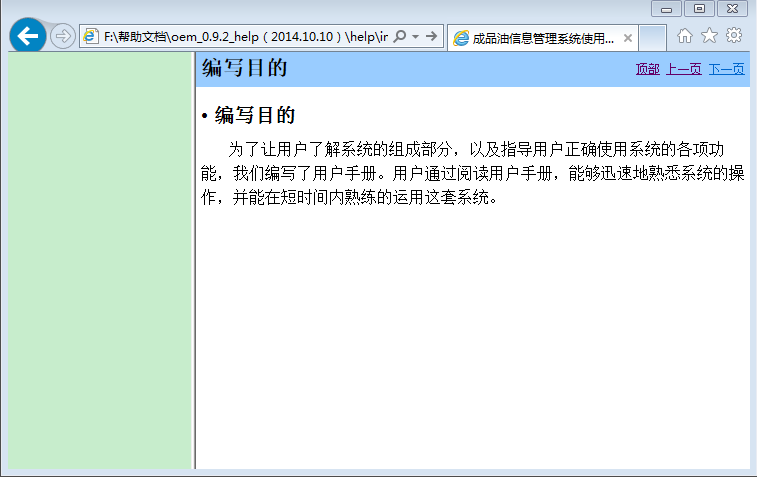
后测试发现,将项目名称
oem_0.9.2_help(2014.10.10)
改为 oem_0.9.2_help(2014.10.10)
就好了~
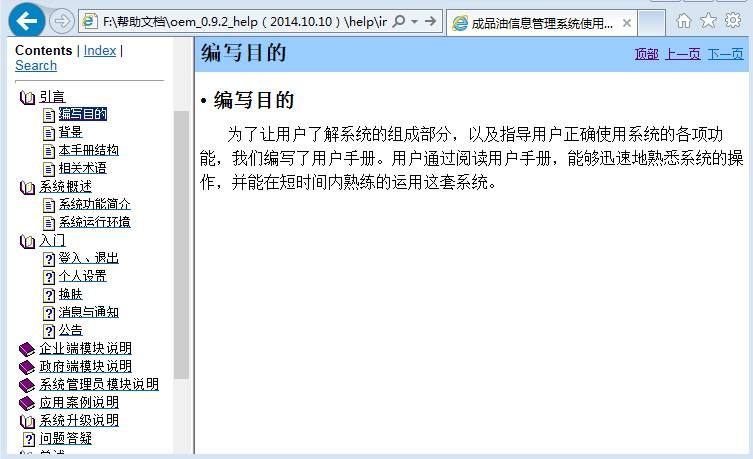
判断是项目名称中文字符不支持造成的。
近期发现每天在 Github 做代码提交,但是 contributions 的面板(贡献图)上的绿点(即贡献值)却没有增长了。擦~ 有两个礼拜了。如下图
而且,同时发现以前的绿点也是稀稀拉拉的,遂感觉 contributions 可能被漏记了。看了下 Github 对于 contributions 的 说明更新时间是在昨天(2014-10-17),说明 contributions 的统计策略是经常改变的。
本文详细说明了如何contributions贡献值是如何统计的。同时参照最新的 contributions 的 说明(时间 2014-10-17),并且在以后会同步官网的更新,方便各位网友。
#哪些 contributions 贡献值会被统计
##Issues and pull requests 问题和请求
问题和请求将出现在您的贡献图上需满足下面这两个条件:
##Commits 提交
提交将出现在您的贡献图上,如果它们满足所有以下条件:
此外,至少其中一项必须为真:
私人库的贡献只会显示给可以访问这些库的用户。这些贡献都不会呈现给无法访问这些库的用户。
#贡献不被计算在内的常见原因
##你还没在你 GitHub 配置文件中添加你本地 Git 提交的电子邮件
提交时必须采用已添加到您 GitHub 的配置文件,出现在你的贡献图上的电子邮件地址。您可以检查电子邮件通过将.patch 添加到用于提交 URL 后面,例如 https://github.com/octocat/octocat.github.io/commit/67c0afc1da354d8571f51b6f0af8f2794117fd10.patch :
From 67c0afc1da354d8571f51b6f0af8f2794117fd10 Mon Sep 17 00:00:00 2001 From: The Octocat Date: Sun, 27 Apr 2014 15:36:39 +0530 Subject: [PATCH] updated index for better welcome message
其中电子邮件的格式: 字段是在本地 git 的配置设置中设置的地址。在此示例中,用于提交的电子邮件地址是 [email protected]。
如果没有被用于提交的电子邮件地址添加到您 GitHub 的配置文件,您必须将电子邮件地址添加到您的 GitHub.com 帐户或 GitHub 企业帐户。当您添加新的地址时,您的贡献图将自动重建。
一般的电子邮件地址——如 [email protected]——不能添加到 GitHub 帐户。如果您使用此类电子邮件为您的提交,提交将不被链接到 GitHub 配置文件并不会显示在您的贡献图。
##提交了一个非默认分支
提交只能是在默认分支 (通常master
)被统计。如果你想在非默认分支中,希望他们能计入您的贡献,需要执行以下任一操作:
更改存库中的默认分支将更改它的所有库中的合作者。只能这样做,如果你想要新分支成为所有未来的请求和提交所针对的基础。
##在 fork 中做了提交
在一个 fork 作出的提交将不计入你的贡献。要使它们计数,必须执行下列操作之一:
近期在做一个版本号的判断,在使用 Java split() 方法时,希望把版本号中的数字组成数组。很自然的,我用了 split(“.”) 来分割成数组,结果不行。
String v = "1.0.1";
String[] vs = v.split(".");
int len = vs.length;
for(int i = 0; i<len; i ++){
System.out.println(vs[i]);
}
后查 API,得知 split 的参数是 String regex 代表的是一个正则表达式。如果是正则中的特殊字符,就不能了。点正好是一个特殊字符。如下方式解决:
String v = "1.0.1";
String[] vs = v.split("[.]");
int len = vs.length;
for(int i = 0; i<len; i ++){
System.out.println(vs[i]);
}
如果没有 <label> 当然也能显示 <input> 的本文, 比如
<input type="radio" name="status" checked="true" value="0"/>改造前
<input type="radio" name="status" value="2"/>改造后
<input type="checkbox" name="status1" value="3"/>www.waylau.com
点击组件上的文本不会有任何效果
改造前 改造后 www.waylau.com
但是,加上 <label> 后立马就不同了,可以点击文本来选中组件
<label><input type="radio" name="status2" checked="true" value="0"/>改造前</label>
<label><input type="radio" name="status2" value="2"/>改造后</label>
<label><input type="checkbox" name="status3" value="3"/>www.waylau.com</label>
#需求 想要实现一个照片,鼠标移到照片上,可以显示编辑该照片的工具栏
#实现
##整体布局
<div id="photo_id" class="photo_contarner" onmouseover="handlerIn( event )" onmouseout="handlerOut( event )">
<div class="toolbar" name="toolbar" id="toolbar">
</div>
</div>
一个照片,上面加一个 div 工具栏(toolbar)里面有两个按钮
##样式
.photo_contarner {
width: 128px;height: 128px;
margin: 20px;
float: left;
position:relative;
}
.photo_contarner img{
width: 128px;height: 128px;
border: 0
}
.toolbar {
position:absolute;
width: 48px;
height: 24px;
top: 0px;
right: 0px;
z-index:3;
background-color: gray;
}
.toolbar_edit {
background:url(../img/edit_24.png);
}
.toolbar_delete {
background:url(../img/remove_24.png);
}
.toolbar_edit,.toolbar_delete{
width:24px;height:24px;float: left;
}
先看下整体效果,工具栏在照片上的右上角,工具栏包含两个图标。关键点: z-index:3
该属性设置元素的堆叠顺序。拥有更高堆叠顺序的元素总是会处于堆叠顺序较低的元素的前面。
默认工具栏为隐藏 .toolbar 的样式中添加
display:none;
##事件 鼠标移入移出事件,移入为显示,移出为隐藏
var handlerIn = function( event ){ document.getElementById(‘toolbar’).style.display =’block’; };
var handlerOut = function( event ){ document.getElementById(‘toolbar’).style.display =’none’; };
#源码 HTML 遮罩显示工具栏源码
本文将通过 Yeoman 创建一个 AngularJS 应用,同时 也能感受到 Grunt 和 Bower 的功能。
Yeoman 是一位戴帽子、立意奇颖的人。
Yeoman 是一套工作流程。
Yeoman 是Web 应用开发脚手架。
通过很少的命令,就能给你整个应用或者独立的模块生成模板代码,比如控制器或者模型。Yeoman 可以启动预览 Web 服务器,观察文件,如果被编辑,就会重新加载的变化和编译你的 Sass 。 Yeoman 也可以运行单元测试,最小化代码,优化图像等等。
Yeoman 致力于提高你在构建web应用时的生产力和舒适度,优化工作流程。用到三种核心工具:yo(脚手架工具),grunt(构建工具),bower(包管理工具)。
Yo 一个用于构建特定框架的生态系统的代码工具,称之为生成器(generator)。使用 yo 就能提前处理那些些繁琐的任务。
Grunt 被用来构建,预览以及测试你的项目,感谢来自那些由 Yeoman 团队和 grunt-contrib 所管理的任务的帮助。
Bower 被用来进行依赖管理,所以你不再需要手动的下载和管理你的脚本了。
你能使用 npm 安装生成器,现在可用的生成器数量已经超过了 1000+个生成器,这其中很多都是由开源社区编写的。比较受欢迎的有 generator-angular、 generator-backbone、 generator-ember。
##为何用 Yeoman
Yeoman 是一个强大的有想法的客户端栈,包括那些能帮助开发者快速构建漂亮web应用的工具和框架。我们关注于提供所有应用上手所需要的东西,尽量免去所有手动安装的麻烦。
采用了可以扩展的模块化架构,我们利用来自一些开源社区的成功经验和教训来确保开发者使用的栈尽可能的智能。
作为一个良好的文档和深思熟虑的构建过程的坚定的拥趸,Yeoman 包括了对代码规范检测,测试,最小化以及更多其他功能的支持,所以开发者可以专注于解决方案而不用担心这些零散的东西。
Yeoman 是快速的,高性能的并且经过优化可以很好的在现代浏览器中工作。
大部分通过命令行形式与 Yeoman 相互作用。支持MAC、Linux、Windows等名称。本文以 Windows 为例,用cmd.exe
##安装前提
安装 Yeoman, 先要安装:
确认安装成功:
$ node –version && npm –version
$ git –version
##安装 Yeoman 工具集
该工具集包括了 Yeoman、Bower、Grunt
$ npm install –global yo
完成后出现如下界面:
确认安装成功
$ yo –version && bower –version && grunt –version
出现
C:\Users\Administrator>yo –version && bower –version && grunt –version [?] ========================================================================== We’re constantly looking for ways to make yo better! May we anonymously report usage statistics to improve the tool over time? More info: https://github.com/yeoman/insight & http://yeoman.io ==========================================================================: (Y/n )
意思是说,是否愿意上报使用统计。输入 y 或者 n 或者任意字符,继续
则会显示三个版本信息,分别是 Yeoman、Bower、Grunt CLI 的。说明yeoman 安装成功。
在传统的 Web 开发流程,你将需要花大量的时间给你的 webapp 建立样板代码,下载依赖,并手动创建应用的文件夹结构。现在这一切交给 Yeoman 生成器来做!下面安装 AngularJS 的生成器
##安装 AngularJS 的生成器
Yeoman 生成器使用 npm 命令,现在可用的生成器数量已经超过了 1000+个生成器,这其中很多都是由开源社区编写的
安装 generator-angular 生成器
$ npm install –global [email protected]
0.9.5
指版本号
Yeoman 脚手架,会根据你的具体配置要求自动生产应用文件。
##创建项目文件夹
在你的工作区间(可以是任意目录)创建项目文件夹 mytodo
(可以是任意项目名称),并且切换到该应用文件夹目录下
$ mkdir mytodo && cd mytodo
本例的工作目录是D:\workspaceNG
##使用生成器
查看所有的生成器
$ yo
键盘上下键选中 angular 的生成器,点击
enter
键
当你熟悉了你的生成器之后,可以使用快速命令
$ yo angular
##配置生成器
一些生成器也会提供一些有共同开发库(common developer libraries)的可选配置来定制你的应用,能够加速初始化你的开发环境。 generator-angular 会询问你需不需要使用 Sass (使用 Compass)或者Twitter Bootstrap,使用’n’和’y’进行选择。本例不要用 Sass ,而选用 Bootstrap
接着选用 Angular 模块。你可以使用空格键来取消项目。(当你在试用空格的效果时,确保所有的模块都被标记为绿色)。我们选用默认值就可以(即全部选中)。
点击 enter
键,此时将会自动生成代码
打开’mytodo’目录,会看到下面的文件结构:
bower_components, bower.json:存放项目相关的JavaScript或Web依赖,由bower安装的
Gruntfile.js, package.json, and node_modules: Grunt需要使用的依赖以及配置
另外:示例中的所有 js
代码都使用了严格模式,有关严格模式的内容可以参考http://www.waylau.com/javascript-use-strict-mode/
无需在你的电脑中安装 web 服务器,Yeoman 已经包含了。
##启动服务
$ grunt serve
浏览器访问 localhost:9000 (或者 127.0.0.1:9000 )
##关闭服务
使用 Ctrl+C
键
##查看文件
现在可以打开编辑器开始更改应用。每次保存更改后,浏览器将会自动刷新,就是说你是不需要手动再刷新浏览器了。这个被称作live reloading
,这提供了一个很好的方式来实时查看应用的状态。它是通过一系列的 Grunt 任务(配置在 Gruntfile.js
)来监视你的文件的更改情况,一旦发现文件被改动了,live reloading
就会自动刷新应用。在这个例子中,我们编辑了 main.html
,通过 live reloading
我们从下面的状态:
马上到了这个状态:
(PS:在各个浏览器测试中,老旧的浏览器可能不会自动刷新页面,比如IE9)
这里 Yeoman 提供最终的项目源码,如果打不开(国外网站,可能被墙),也可以访问笔者的项目源码https://github.com/waylau/mytodo
##创建新模板展现 Todo 列表
打开views/main.html
除了 <div class="jumbotron">
其他标签都清除了。并把 jumbotron
改名为 container
,最终代码是这样的
<div class="container">
</div>
打开 scripts/controllers/main.js
代码修改为,todos
为 列表容器:
'use strict';
angular.module('mytodoApp')
.controller('MainCtrl', function ($scope) {
$scope.todos = ['Item 1', 'Item 2', 'Item 3'];
});
修改 main.html
,将todos
中的项目以input
标签形式输出:
<div class="container">
<h2>My todos</h2>
<p class="form-group" ng-repeat="todo in todos">
<input type="text" ng-model="todo" class="form-control">
</p>
</div>
在 p
标签中的 ng-repeat 属性是一个 Angular 指令 (directive),当获取到一个集合(collection)中的项时,它将项实例化。
在我们的例子中,你可以想象一下,每个 p 标签和它的内容都带着这个’ng-repeat‘属性。对于每个在todos数组中的项,Angular都会生成一组新的 <p><input></p>
ng-model 是另一个 Angular 指令,它主要是和input
、select
、textarea
标签和一些自定义控件一起使用,达到数据双向绑定的效果。在我们的例子中,它用于显示一系列带有todo
的值的文本输入域。
在浏览器中查看ng-repeat和ng-model动态变化的效果。在保存之前,我们的应用看起来应该是下图这个样子的:
更新 $scope.todos
,增加第四个项目
$scope.todos = ['Item 1', 'Item 2', 'Item 3', 'Item 4'];
通过 live reloading
我们看到页面新的项目出现了。移除第四个项目,则页面也移除了。
##增加一个 todo 项目
下面将实现添加一个 todo
到列表中,修改 main.html
:在h2
元素和 p
元素之间加上一个 form
元素。现在你的 main.html
应该是下面这个样子:
<div class="container">
<h2>My todos</h2>
<!-- Todos input -->
<form role="form" ng-submit="addTodo()">
<div class="row">
<div class="input-group">
<input type="text" ng-model="todo" placeholder="What needs to be done?" class="form-control">
<span class="input-group-btn">
<input type="submit" class="btn btn-primary" value="Add">
</span>
</div>
</div>
</form>
<p></p>
<!-- Todos list -->
<p class="form-group" ng-repeat="todo in todos">
<input type="text" ng-model="todo" class="form-control">
</p>
</div>
在页面顶部增加了一个带有提交按钮的表单。这个表单使用了另一个Angular指令 ng-submit。返回查看你的浏览器,现在的UI应该是下面这个这样子的:
点击 Add
按钮,啥事都不会发生,现在要做下改动:
ng-submit
是将一个 Angular 表达式绑定到表单的 onsubmit
事件上。如果 form
上没有绑定任何动作,它也会阻止浏览器的默认行为。在我们的例子中,我们添加了一个 addTodo()
表达式。
下面的 addTodo
方法是实现将新增的 todo
项目添加入已有的事项列表中,然后清空顶部的文本输入域:
$scope.addTodo = function () {
$scope.todos.push($scope.todo);
$scope.todo = '';
};
将 addTodo()
方法加到 main.js
的 MainCtrl
控制器的定义中,现在你的控制器代码应该如下所示:
'use strict';
angular.module('mytodoApp')
.controller('MainCtrl', function ($scope) {
$scope.todos = ['Item 1', 'Item 2', 'Item 3'];
$scope.addTodo = function () {
$scope.todos.push($scope.todo);
$scope.todo = '';
};
});
添加一个文本进去看下效果:
注意:本例只是一个简单的演示,未对输入做验证
##移除一个 todo 项目
现在来添加一个移除 todo 项目的功能,先在列表中每一个 todo 项目的边上加上一个 移除
按钮。回到我们的视图模板(main.html),在现有的 ng-repeat
指令上添加一个按钮。然后确认我们的输入框和移除按钮是对齐的,将 p
标签的 class
从 form-group
改成 input-group
。 再改动之前代码是这样的:
<!-- Todos list -->
<p class="input-group" ng-repeat="todo in todos">
<input type="text" ng-model="todo" class="form-control">
<span class="input-group-btn">
<button class="btn btn-danger" ng-click="removeTodo($index)" aria-label="Remove">X</button>
</span>
</p>
回到浏览器,现在你的应用看起来有点靓了哦!
上面的代码中使用了一个新的 Angular 指令 ng-click。可以用 ng-click 来控制元素被点击时的行为。在这个例子中,我们调用了removeTodo()
方法并将 $index
传入了这个方法。
$index
的值是当前 todo
项在整个 todos
数组中的位置的索引值。举个例子,数组中的第一项的索引值是0,那么0就会被传入removeTodo()
;类似的,在一个五项的Todo列表中,最后一项的索引值是4,4就会被传入 removeTodo()
。
现在我们来实现这个 removeTodo()
方法,下面的代码是使用 JavaScript
中的 splice
方法将要移除的项通过给定的 $index
值从数组中移除:
$scope.removeTodo = function (index) {
$scope.todos.splice(index, 1);
};
完整的 main.js
代码如下:
'use strict';
angular.module('mytodoApp')
.controller('MainCtrl', function ($scope) {
$scope.todos = ['Item 1', 'Item 2', 'Item 3'];
$scope.addTodo = function () {
$scope.todos.push($scope.todo);
$scope.todo = '';
};
$scope.removeTodo = function (index) {
$scope.todos.splice(index, 1);
};
});
回到浏览器,现在你可以点击移除按钮将一个 todo 项从列表中移除。有点屌!
虽然我们可以添加和移除Todo事项,但是这些记录都不能永久地保存。一旦页面被刷新了,更改的记录都会不见了,又恢复到 main.js
中设置的todo
数组的值。不过不要担心这个问题,之后会讲到更多关于使用 Bower
安装包,这个问题就会被解决的。
现在给我们的列表添加一些排列方式来合理地显示它。所以我们要使用Bower
安装了一个 Angular 组件,叫做AngularUI Sortable module。
##列出已经安装的包
用下面的指令我们可以检查现在已经安装上的包:
$ bower list
在项目初始化配置的时候,我们已经将包添加进了项目
##查询包
查找angular-ui-sortable
包,确认有 AngularUI 的包可以使用
$ bower search angular-ui-sortable
结果搜到两个记录,我们需要的是第一个
同时,我们还要安装另外一个jQuery UI,包名是”jquery-ui”.
进行包的安装:
$ bower install –save angular-ui-sortable
$ bower install –save jquery-ui
用 --save
更新 bower.json
文件中关于angular-ui-sortable和jquery-ui的依赖,这样你就不用手动去 bower.json
中更新依赖了。
也可以用下面的命令,将多个包一起安装
$ bower install –save angular-ui-sortable jquery-ui
##确认安装
看一下你的 bower_components
目录是不是所有包都已经检出下来了,你可以看到 jquery-ui
和 angular-ui-sortable
出现在之前已经安装的Angular包边上了:
##让 todos 应用可排序
这些新安装的依赖要被添加进我们的 index.html
文件。你可以手动添加,不过其实Yeoman会自动添加上。先在命令行中使用Ctrl+c,退出当前的进程。再次运行:
$ grunt serve
可以看到,新的包已经添加进来了
<!-- build:js(.) scripts/vendor.js -->
<!-- bower:js -->
<script src="bower_components/jquery/dist/jquery.js"></script>
<script src="bower_components/angular/angular.js"></script>
<script src="bower_components/json3/lib/json3.js"></script>
<script src="bower_components/bootstrap/dist/js/bootstrap.js"></script>
<script src="bower_components/angular-resource/angular-resource.js"></script>
<script src="bower_components/angular-cookies/angular-cookies.js"></script>
<script src="bower_components/angular-sanitize/angular-sanitize.js"></script>
<script src="bower_components/angular-animate/angular-animate.js"></script>
<script src="bower_components/angular-touch/angular-touch.js"></script>
<script src="bower_components/angular-route/angular-route.js"></script>
<script src="bower_components/jquery-ui/jquery-ui.js"></script>
<script src="bower_components/angular-ui-sortable/sortable.js"></script>
<!-- endbower -->
<!-- endbuild -->
为了使用Sortable模块
,我们需要在 scripts/app.js
中更新Angular 模块,将 Sortable
可以加载到我们的应用中,更改前代码,
将 ui.sortable
添加进数组中,如下:
angular
.module('mytodoApp', [
'ngAnimate',
'ngCookies',
'ngResource',
'ngRoute',
'ngSanitize',
'ngTouch',
'ui.sortable'
])
最后,在 main.html
中,我们需要将 ui-sortable
指令作为一个div
将 ng-repeat
层包起来。
<!-- Todos list -->
<div ui-sortable ng-model="todos">
<p class="input-group" ng-repeat="todo in todos">
添加一些内联的CSS,将鼠标显示为“可移动”样式来告诉用户这些 todo 项是可以移动的:
<p class="input-group" ng-repeat="todo in todos" style="padding:5px 10px; cursor: move;">
完整代码如下:
<!-- Todos list -->
<div ui-sortable ng-model="todos">
<p class="input-group" ng-repeat="todo in todos" style="padding:5px 10px; cursor: move;">
<input type="text" ng-model="todo" class="form-control">
<span class="input-group-btn">
<button class="btn btn-danger" ng-click="removeTodo($index)" aria-label="Remove">X</button>
</span>
</p>
</div>
效果如下:
Karma是一个JS测试框架。Angular生成器本身已经包括了两个测试框架:ngScenario 和Jasmine。当之前我们运行yo angular
的时候,在 mytodo
文件夹下会生成了一个 test
目录,还有一个 karma.conf.js
文件,它会被放入在 Node
模块中以使用Karma
。我们将会编辑一个 Jasmine
脚本来完成我们的测试。现在先来看看要怎么进行测试。
##执行单位测试
现在回到命令行结束 grunt server
的进程(使用 Ctrl+c
)。在Gruntfile.js
中已经有了用于运行测试的grunt任务,可以直接像下面这样运行:
$ grunt test
之后在控制台会看到几条警告信息,测试失败,不要紧,下面进行修正。
##更新 Karma 配置
首先, 修改 karma.conf.js
,添加
'bower_components/jquery/dist/jquery.js',
'bower_components/jquery-ui/ui/jquery-ui.js',
'bower_components/angular-ui-sortable/sortable.js',
最终的样子是:
files: [
'bower_components/angular/angular.js',
'bower_components/angular-mocks/angular-mocks.js',
'bower_components/angular-animate/angular-animate.js',
'bower_components/angular-cookies/angular-cookies.js',
'bower_components/angular-resource/angular-resource.js',
'bower_components/angular-route/angular-route.js',
'bower_components/angular-sanitize/angular-sanitize.js',
'bower_components/angular-touch/angular-touch.js',
'bower_components/jquery/dist/jquery.js',
'bower_components/jquery-ui/ui/jquery-ui.js',
'bower_components/angular-ui-sortable/sortable.js',
'app/scripts/**/*.js',
'test/mock/**/*.js',
'test/spec/**/*.js'
],
##更新单位测试
打开test/spec/controllers/main.js
,这个是测试 MainCtrl
控制器的。这个测试样本还是引入了之前老项目的代码,需要进行修改,将
it('should attach a list of awesomeThings to the scope', function () {
expect(scope.awesomeThings.length).toBe(3);
});
改为
it('should have no items to start', function () {
expect(scope.todos.length).toBe(0);
});
打开scripts/controllers/main.js
,清空 todos
数组
$scope.todos = [];
执行测试
$ grunt test
测试通过,效果如下:
##添加更多单位测试
上面例子只测试了部分方法,可以再多加:
it('should add items to the list', function () {
scope.todo = 'Test 1';
scope.addTodo();
expect(scope.todos.length).toBe(1);
});
it('should add then remove an item from the list', function () {
scope.todo = 'Test 1';
scope.addTodo();
scope.removeTodo(0);
expect(scope.todos.length).toBe(0);
});
MainCtrl 控制器完整的测试文档(test/spec/controllers/main.js
),如下:
'use strict';
describe('Controller: MainCtrl', function () {
// load the controller's module
beforeEach(module('mytodoApp'));
var MainCtrl,
scope;
// Initialize the controller and a mock scope
beforeEach(inject(function ($controller, $rootScope) {
scope = $rootScope.$new();
MainCtrl = $controller('MainCtrl', {
$scope: scope
});
}));
it('should have no items to start', function () {
expect(scope.todos.length).toBe(0);
});
it('should add items to the list', function () {
scope.todo = 'Test 1';
scope.addTodo();
expect(scope.todos.length).toBe(1);
});
it('should add then remove an item from the list', function () {
scope.todo = 'Test 1';
scope.addTodo();
scope.removeTodo(0);
expect(scope.todos.length).toBe(0);
});
});
测试通过,效果如下:
屌爆了!
当项目变大,开发人员不断加入的时候,编写单元测试更容易捕捉 BUG,Yeoman 的脚手架功能使编写单元测试更容易,所以没有理由不写自己的测试!;)b
##为产品优化文件
为了将应用发布为产品版本,还需要做很多工作:
呦西~实现上述目标只需一句:
$ grunt
这个命令将会完成 Grunt 的任务以及根据 Gruntfile.js 文件进行配置,创建一个可以运行的应用版本。只需等上一分钟,你就能得到一个完整的编译版本,和一份编译过程耗时的报告。
编译完成后的文件,放在了 dist 目录下,是一个可以拿去服务器上的部署的真正的产品。
##编译和预览应用产品
执行一句
$ grunt serve:dist
它会自动编译项目,并且启动 web 服务器 。Yo 真是牛!
之前项目的数据,当浏览器刷新后就不会保存了。现在扯下数据持久化。
##安装 Bower 包
安装 Angular 模块 angular-local-storage,让我们快速实现本地存储(local storage)
执行
$ bower install –save angular-local-storage
##添加本地存储 关闭线程,重启服务
$ grunt serve
index.html
页面会自动引入包
<script src="bower_components/angular-local-storage/angular-local-storage.js"></script>
编辑 scripts/app.js
添加 LocalStorageModule
的 适配器:
angular
.module('mytodoApp', [
'ngAnimate',
'ngCookies',
'ngResource',
'ngRoute',
'ngSanitize',
'ngTouch',
'ui.sortable',
'LocalStorageModule'
])
同时也要配置 localStorageServiceProvider
,用ls
为 localStorage
名称前缀这样你的应用程序不会碰巧读到,从另一个应用程序使用相同的变量名:
.config(['localStorageServiceProvider', function(localStorageServiceProvider){
localStorageServiceProvider.setPrefix('ls');
}])
完整的文件:
'use strict';
angular
.module('mytodoApp', [
'ngAnimate',
'ngCookies',
'ngResource',
'ngRoute',
'ngSanitize',
'ngTouch',
'ui.sortable',
'LocalStorageModule'
])
.config(['localStorageServiceProvider', function(localStorageServiceProvider){
localStorageServiceProvider.setPrefix('ls');
}])
.config(function ($routeProvider) {
$routeProvider
.when('/', {
templateUrl: 'views/main.html',
controller: 'MainCtrl'
})
.when('/about', {
templateUrl: 'views/about.html',
controller: 'AboutCtrl'
})
.otherwise({
redirectTo: '/'
}); });
需要在你的控制器scripts/controllers/main.js
中声明对本地存储服务的依赖。将localStorageService
作为第二个传入参数添加到你的回调函数中。
'use strict';
angular.module('mytodoApp')
.controller('MainCtrl', function ($scope, localStorageService) {
// (code hidden here to save space)
});
现在,todo 项就不是从静态的数组中读取的,将会从本地存储里读取然后再将它们存入$scope.todos
中。 我们还需要使用 Angular 的 $warch
监听器来监听 $scope.todos
的值得变化。如果有人添加或者删减了 todo 项目,本地存储中的数据也会被同步
因此,我们需要将现在的 $scope.todos
声明删掉:
$scope.todos = [];
替换为:
var todosInStore = localStorageService.get('todos');
$scope.todos = todosInStore && todosInStore.split('\n') || [];
$scope.$watch('todos', function () {
localStorageService.add('todos', $scope.todos.join('\n'));
}, true);
完整的代码:
'use strict';
angular.module('mytodoApp')
.controller('MainCtrl', function ($scope, localStorageService) {
var todosInStore = localStorageService.get('todos');
$scope.todos = todosInStore && todosInStore.split('\n') || [];
$scope.$watch('todos', function () {
localStorageService.add('todos', $scope.todos.join('\n'));
}, true);
$scope.addTodo = function () {
$scope.todos.push($scope.todo);
$scope.todo = '';
};
$scope.removeTodo = function (index) {
$scope.todos.splice(index, 1);
};
});
在浏览器中查看应用,你会发现 todo 列表中没有任何东西。因为这个应用从本地存储中读取了 todo 数组,而本地存储中还没有任何 todo 项。
再来添加一些项目到列表中吧:
在当我们再次刷新我们的浏览器的时候,这些项目都还在。哦也~
在Chrome浏览器 按 F12 ,弹出开发工具(Chrome DevTools)中的 Resources 面板里确认我们的数据是不是真的被永久储存在本地存储中。在资源面板的左侧里选中Local Storage
:
更多有关单位测试的,可以移步至Unit Testing Best Practices in AngularJS
##Yeoman 可以做更多
Yeoman 支持 包括 Angular 在内的其他框架的脚手架。
Anugular生成器也支持创建新的视图、指令和控制器。可以通过运行 yo angular:route routeName
搭建一个新的控制器,同时在 app.js
中的路由也会被更新。在可能使用单元测试的地方,我们也会试图搭建测试。
了解更多有关于 Angular 生成器的 Yeoman 命令,请查看generator readme。
##下步工作
这里 Yeoman 提供最终的项目源码,如果打不开(国外网站,可能被墙),也可以访问笔者的项目源码https://github.com/waylau/mytodo
--当天开始
SELECT dateadd(ms,0,DATEADD(dd, DATEDIFF(dd,0,getdate()), 0)) 当天开始
--当天结束
SELECT dateadd(ms,-3,DATEADD(dd, DATEDIFF(dd,-1,getdate()), 0)) 当天结束
--当月第一天
SELECT DATEADD(mm, DATEDIFF(mm,0,getdate()), 0) 当月第一天
--当月最后一天
SELECT dateadd(ms,-3,DATEADD(mm, DATEDIFF(m,0,getdate())+1, 0)) 当月最后一天
#jQuery and AngularJS 苹果、橙
jQuery 和 AngularJS 就像苹果和橙,本身不是一类东西,注重点也不同。
jQuery 主要是用来操作DOM,作用就是消除各浏览器的差异,简化和丰富DOM 的API,比如 DOM 文档的转换,事件处理,动画,和 AJAX 交互等。
AngularJS 是一个完整的框架,试图解决现代 Web 2.0 应用程序开发的各个方面。 AngularJS 有着诸多特性,最为核心的是:MVC、模块化、自动化双向数据绑定、语义化标签、依赖注入,等等。(看到了Flex 和 Spring 的影子)
最重要的是,用 AngularJS 以一种完全不同的方法构建用户界面,其中以声明方式指定视图的模型驱动的变化。而 jQuery 常常需要编写以DOM为中心的代码,随着项目的增长(无论是在规模和交互性方面)将会变得越来越难控制。
用 AngularJS 以现代的Web应用程序开发的整体方法,并试图让浏览器更好的发展平台。
#简单的例子比较 几个例子看出他们的不同点
##模板
在jQuery里面,会用编程的方式来修改视图,像下面这样用ul
标签来定义一个下拉列表:
<ul class="main-menu">
<li class="active">
<a href="#/home">Home</a>
</li>
<li>
<a href="#/menu1">Menu 1</a>
<ul>
<li><a href="#/sm1">Submenu 1</a></li>
<li><a href="#/sm2">Submenu 2</a></li>
<li><a href="#/sm3">Submenu 3</a></li>
</ul>
</li>
<li>
<a href="#/home">Menu 2</a>
</li>
</ul>
在jQuery里面,会像下面这行代码一样来创建这个下拉列表:
$('.main-menu').dropdownMenu();
如果我们仅仅看视图代码,我们无法立刻发现它有什么功能。对于小型的应用来说,这样做还算可以。但是对于大型应用来说,很快就会变得混乱并难以维护。
然而,在AngularJS中,视图是一种模板,一种潜规则,ul
声明看起来就像下面这样:
<ul class="main-menu" dropdown-menu>
...
</ul>
两种方式的效果完全相同,但是在 AngularJS 的版本中,每一个看到模板的人都知道它在做什么(潜规则)。 不管什么时候开发团队有新人进来,她看到这种代码之后就会立即明白,存在一个叫做dropdownMenu
的指令,这个指令负责操控这个视图。凭直觉就可以知道答案,没有必要看任何代码。视图本身已经告诉了我们这里会发生什么。这样就更加清晰了。
##数据绑定 数据绑定作为 AngularJS 的特性之一,更新视图,无需操纵 DOM ,剩下很多代码( 想想 Flex )。在jQuery更新视图的步骤是这样的,将设有如下视图
<ul class="messages" id="log">
</ul>
我要在ul
插入li
,需要操作 DOM 来添加节点元素。
$.ajax({
url: '/myEndpoint.json',
success: function ( data, status ) {
$('ul#log').append('<li>Data Received!</li>');
}
});
假设,此时,我要删除log
视图,那我不得不去 操作 DOM,把ajax 里面的添加方法修改了。太蛋疼了。其实在 js 里面写 html 本身就是一件困难的事,因为 html 包含尖括号、属性、双引号、单引号、方法,在 js 需要对这些特殊符号进行转义 ,代码将会变得冗长易出错且难以识别。 如下面的例子:
var str = "<a href=# name=link5 class="menu1 id=link1" + "onmouseover=MM_showMenu(window.mm_menu_0604091621_0,-10,20,null,\'link5\');"+ "sel1.style.display=\'none\';sel2.style.display=\'none\';sel3.style.display='none\';"+" onmouseout=MM_startTimeout();>Free Services</a> ";
document.write(str);
看下 AngularJS 是怎么干的,先定义一个界面模板
<ul class="messages">
<li ng-repeat="entry in log"></li>
</ul>
而后更新数据
$http( '/myEndpoint.json' ).then( function ( response ) {
$scope.log.push( { msg: 'Data Received!' } );
});
视图就会根据数据自动刷新了。而界面改成什么样,并不需要去修改更新数据的接口,比如改成下面的样子
<div class="messages">
<div class="alert" ng-repeat="entry in log">
</div>
</div>
#不要用jQuery思维写AngularJS应用 用 AngularJS 模型为中心和 jQuery DOM为中心的范式完全不同。经验丰富的jQuery开发者开发 AngularJS 可能会陷入“范式的陷阱”。建议你跳过 JQuery 的依赖,同时学习用 AngularJS(只是不想回到旧的习惯和学会用AngularJS方式解决问题)。不要混合使用 jQuery 和 AngularJS 。不要使用 jQuery 。最好不要引入它。当你遇到一个问题,而这个问题你知道如何使用 jQuery 去解决,那么在你使用$之前, 请思考一下如何以 AngularJS 的方式去解决它。 jQuery 从来就不是必须的。
在架构上,AngularJS 主要是用来构架SPA单页面应用,而不是普通的网页集合,所以在架构上要整体考虑,包括服务端和客户端,如何将应用进行分解,划分模块,考虑模块的独立性、可扩展行,以及可测试性。
##参考
约定优于配置是一个简单的概念。 系统,类库,框架应该假定合理的默认值,而非要求提供不必要的配置。 在大部分情况下,你会发现使用框架提供的默认值会让你的项目运行的更快。
零配置并不是完全没有配置,而是通过约定来减少配置, 减少 XML
#约定代码结构或命名规范来减少配置数量
如果模型中有个名为Sale的类,那么数据库中对应的表就会默认命名为sale。只有在偏离这一约定时,例如将该表命名为”products_sold”,才需写有关这个名字的配置。
比如 EJB3 持久化,将一个特殊的Bean持久化,你所需要做的只是将这个类标注为 @Entity 。 框架将会假定表名和列名是基于类名和属性名。 系统也提供了一些钩子,当有需要的时候你可以重写这些名字.
比如 maven 项目约定,在没有自定义的情况下,源代码假定是在 /workspace/content-zh/src/main/java
,资源文件假定是在/workspace/content-zh/src/main/resources
。测试代码假定是在 /workspace/content-zh/src/test
。项目假定会产生一个 JAR 文件。Maven假定你想要把编译好的字节码放到 /workspace/content-zh/target/classes
并且在 /workspace/content-zh/target
创建一个可分发的 JAR 文件。Maven 对约定优于配置的应用不仅仅是简单的目录位置,Maven 的核心插件使用了一组通用的约定,以用来编译源代码,打包可分发的构件,生成 web 站点,还有许多其他的过程。 Maven 的力量来自它的”武断”,它有一个定义好的生命周期和一组知道如何构建和装配软件的通用插件。如果你遵循这些约定,Maven 只需要几乎为零的工作——仅仅是将你的源代码放到正确的目录,Maven 将会帮你处理剩下的事情。
比如 Yeoman 创建项目,只需一行代码
yeoman init angular
就会创建整个详细结构包括渲染路由的骨架,单元测试等
比如 HTML5 Boilerplate,为App的默认模板以及文件路径规范,无论是网站或者富UI的App,都可以采用这个模板作为起步。HTML5 Boilerplate的模板核心部分不过30行,但是每一行都可谓千锤百炼,可以用最小的消耗解决一些前端的顽固问题:
#采用更简洁的配置方式来替代XML
##比如:hibernate.properties
的 c3p0 方式:
hibernate.connection.driver_class = org.postgresql.Driver
hibernate.connection.url = jdbc:postgresql://localhost/mydatabase
hibernate.connection.username = myuser
hibernate.connection.password = secret
hibernate.c3p0.min_size=5
hibernate.c3p0.max_size=20
hibernate.c3p0.timeout=1800
hibernate.c3p0.max_statements=50
hibernate.dialect = org.hibernate.dialect.PostgreSQL82Dialect
##比如:hibernate.properties
的 JNDI 方式:
hibernate.connection.datasource = java:/comp/env/jdbc/test
hibernate.transaction.factory_class = \org.hibernate.transaction.JTATransactionFactory
hibernate.transaction.manager_lookup_class = \ org.hibernate.transaction.JBossTransactionManagerLookup
hibernate.dialect = org.hibernate.dialect.PostgreSQL82Dialect
##比如 Apache Shiro 的 ini 配置
[users]
root = secret, admin
guest = guest, guest
presidentskroob = 12345, president
darkhelmet = ludicrousspeed, darklord, schwartz
lonestarr = vespa, goodguy, schwartz
[roles]
admin = *
schwartz = lightsaber:*
goodguy = winnebago:drive:eagle5
##Hibernate通过代码配置
Configuration cfg = new Configuration()
.addClass(org.hibernate.auction.Item.class)
.addClass(org.hibernate.auction.Bid.class)
.setProperty("hibernate.dialect", "org.hibernate.dialect.MySQLInnoDBDialect")
.setProperty("hibernate.connection.datasource", "java:comp/env/jdbc/test")
.setProperty("hibernate.order_updates", "true");
##Gradle 替代 Maven 采用 Maven
<dependency>
<groupId>org.hibernate</groupId>
<artifactId>hibernate-core</artifactId>
<version>4.3.6.Final</version>
</dependency>
采用 Gradle 只需一行
org.hibernate:hibernate-core:4.3.6.Final
#通过注解约定其含义来减少配置数量
##spring注解 Spring会自动搜索某些路径下的Java类,并将这些java类注册为Bean实例,这样就省去了将所有 bean 都在 XML 配置。
<?xml version="1.0" encoding="UTF-8"?>
<beans xmlns="http://www.springframework.org/schema/beans"
xmlns:xsi="http://www.w3.org/2001/XMLSchema-instance"
xmlns:context="http://www.springframework.org/schema/context"
xsi:schemaLocation="http://www.springframework.org/schema/beans
http://www.springframework.org/schema/beans/spring-beans.xsd
http://www.springframework.org/schema/context
http://www.springframework.org/schema/context/spring-context.xsd">
<context:component-scan base-package="com.waylau.rest"/>
</beans>
注意:如果配置了<context:component-scan/>
那么<context:annotation-config/>
标签就可以不用在 xml 中配置了,因为前者包含了后者。另外<context:component-scan/>
还提供了两个子标签<context:include-filter>
<context:exclude-filter>
用来控制扫描文件的颗粒度,例如
<beans>
<context:component-scan base-package="com.waylau.rest">
<context:include-filter type="regex" expression=".*Stub.*Repository"/>
<context:exclude-filter type="annotation"expression="org.springframework.stereotype.Repository"/>
</context:component-scan>
</beans>
代码实现
public static void main(String[] args) {
AnnotationConfigApplicationContext ctx = new AnnotationConfigApplicationContext();
ctx.scan("com.waylau.rest");
ctx.refresh();
MyService myService = ctx.getBean(MyService.class);
}
Spring会合适的将显示指定路径下的类全部注册成Spring Bean。 Spring通过使用特殊的Annotation来标注Bean类。
##Hibernate注解 表与实体映射
@Entity
@Table(name="TBL_FLIGHT",
schema="AIR_COMMAND",
uniqueConstraints=
@UniqueConstraint(
name="flight_number",
columnNames={"comp_prefix", "flight_number"} ) )
public class Flight implements Serializable {
@Column(name="comp_prefix")
public String getCompagnyPrefix() { return companyPrefix; }
@Column(name="flight_number")
public String getNumber() { return number; }
}
甚至 SQL 也可以注解
@Entity
@Table(name="CHAOS")
@SQLInsert( sql="INSERT INTO CHAOS(size, name, nickname, id) VALUES(?,upper(?),?,?)")
@SQLUpdate( sql="UPDATE CHAOS SET size = ?, name = upper(?), nickname = ? WHERE id = ?")
@SQLDelete( sql="DELETE CHAOS WHERE id = ?")
@SQLDeleteAll( sql="DELETE CHAOS")
@Loader(namedQuery = "chaos")
@NamedNativeQuery(name="chaos", query="select id, size, name, lower( nickname ) as nickname from CHAOS where xml:id= ?", resultClass = Chaos.class)
public class Chaos {
@Id
private Long id;
private Long size;
private String name;
private String nickname;
//...
} ##Jersey 2.X 实现 REST 和 MVC
@POST
@Produces({"text/html”})
@Consumes(MediaType.APPLICATION_FORM_URLENCODED)
@Template(name = "/short-link”) @ErrorTemplate(name = "/error-form")
@Valid
public ShortenedLink createLink(@NotEmpty @FormParam("link") final String link) {
// ...
}
##Shiro 的注解
没有注解的情况
//get the current Subject
Subject currentUser =
SecurityUtils.getSubject();
if (currentUser.hasRole(“administrator”)) {
//do something in here that only a administrator
} else {
//don’t do
}
用了注解,简洁很多
@RequiresRoles( “administrator” )
public void openAccount( Account acct ) {
//do something in here that only a administrator
} ##Struts 2.x 注解
package com.waylau.actions;
import com.opensymphony.xwork2.ActionSupport;
import org.apache.struts2.convention.annotation.Action;
import org.apache.struts2.convention.annotation.Actions;
import org.apache.struts2.convention.annotation.Result;
import org.apache.struts2.convention.annotation.Results;
@Results({
@Result(name="failure", location="fail.jsp")
})
public class HelloWorld extends ActionSupport {
@Action(value="/different/url",
results={@Result(name="success", location="http://struts.apache.org", type="redirect")}
)
public String execute() {
return SUCCESS;
}
@Action("/another/url")
public String doSomething() {
return SUCCESS;
}
}
#参考
#问题
` $(window).resize() 是监听窗口大小缩放,而后执行动作。最近在用
echarts`报表时,发现表报的缩放跟不上窗口的缩放节奏,比窗口的缩放总是慢一步。代码
$(window).resize(function(){
myChart.resize();
});
#解决 加个时间,延迟执行就好了
var timer = 0;
$(window).resize(function(){
clearTimeout(timer);
timer = setTimeout(function() {
myChart.resize();
}, 200);
});
html颜色块图标醒目大方。
本文详解颜色块图标的CSS实现。
#设计界面元素 在把主页面的 html 的元素规定好。主要由四个图标组成。如下:
<body>
<div class="container">
<div class="bgblue"> 0#柴油<br/><h1>7.84</h1></div>
<div class="bgblue"> 90#柴油<br/><h1>8.26</h1></div>
<div class="bgblue"> 93#柴油<br/><h1>7.80</h1></div>
<div class="bgblue"> 97#柴油<br/><h1>8.45</h1></div>
</div>
<div id="buttom_id">
更多示例访问:<a href="http://wwww.waylau.com" target="_blank">http://wwww.waylau.com</a>
</div>
</body>
图标直接用的是div
#样式 ##图标样式 底色
background:#123456;
字体颜色(白色)
color:#fff;文本布局(垂直居中)
vertical-align: middle;text-align: center;
float: left;
padding: 20px;
margin-left: 20px;
效果
#圆形图标 可以将图标设置成圆形或者任意角度弧形 增加样式:
border:4px solid;
border-radius:55px;
其中 border-radius
控制div
角度,border
是边框
#整体效果
源码下载
html登录界面,看似简单,无非就是一个底图,一个名称,一个登录,一些底部信息,在没有美工的情况下,纯代码实现还是有些坑。
本文详解透明的登录框的CSS实现。
#设计界面元素 在把主页面的 html 的元素规定好。主要由底图、名称、登录表单、底部信息组成。如下:
<img src="img/bg.jpg" />
<div id="login_id">
<h1>wwww.waylau.com<br/>信息管理系统</h1>
<form id="login_form">
<input name="loginname" type="text" class="loginuser" placeholder="用户名" />
<input name="password" type="password" class="loginpwd" placeholder="密码" />
<input id="login" type="button" class="loginbtn" value="登录" />
</form>
</div>
<div id="buttom_id">
版权所有:<a href="http://wwww.waylau.com" target="_blank">http://wwww.waylau.com</a>
</div>
body
的 底图我的需求是整张图拉伸铺满,而不是重复显示,或者留空。虽然 body
的 background:url(xxx)
可以插入底图,但是 设为no-repeat
的话,如果图太小,会留空,background-size
设置没有达到预期效果。所以直接用了img
.
#样式 ##整体样式 整体是居中的
body {
text-align: center;
margin: 0;
}
##底图的样式
img {
width:100% ;height:100%;position:absolute;
top:0;left:0;right:100;bottom:500;z-index:-1;
}
拉伸图片填充整个界面,其中z-index:-1;
就是让图片的深度降一级,意思是说,图片是在所有元素的后面。
##表单样式
输入表单,我的需求是要透明(正常的input
简直俗透了),只显示一个底部输入线条
#login_form input {
border: 0;
BACKGROUND-COLOR: transparent;
BORDER-BOTTOM: #ffffff 1px solid;
BORDER-LEFT: #ffffff 1px solid;
COLOR: #ffffff;
HEIGHT: 18px;
font-size: 12pt
}
border: 0;
就是不要显示输入框的边框。
BACKGROUND-COLOR: transparent;
这里是设置了透明。
BORDER-BOTTOM
就是 用来显示底线
的,同理BORDER-LEFT
、 BORDER-RIGHT
、BORDER-TOP
就是设置上下左右的边框线条。
#整体效果
么么滴,相册的水印真讨厌。╯﹏╰
另外底图来自《星际争霸》原画,当年最爱的游戏Y(^_^)Y
源码下载
平常用 svn
插件进行项目开发管理,如果要删除项目,就需要安装TortoiseSVN
.
安装成功后,右键
就可以看到TortoiseSVN
提示要求输入服务器或者项目的地址
需要用户名、密码
右击项目,点击delete
日志里写点啥吧~,点击OK
即可
##介绍 http://hibernate.org/tools/
##版本 http://tools.jboss.org/downloads/overview.html
选择对应的版本
至今(2014-12-14) Eclipse Luna 4.4
的最新版本是 `JBoss Tools 4.2.1.Final
##下载
下载安装方式有如下三种:
###1.从marketplace
http://tools.jboss.org/downloads/jbosstools/luna/4.2.0.Beta3.html#marketplace
###2.URL站点更新
http://tools.jboss.org/downloads/jbosstools/luna/4.2.0.Beta3.html#update_site
###3.插件下载
http://tools.jboss.org/downloads/jbosstools/luna/4.2.0.Beta3.html#zips
##使用
###1. 创建Hibernate Configuration File(cfg.xml)
根据要求填入相关配置,测试下能否连接上数据库就行了
###2. 创建Hibernate Console Configuration
选择项目和数据库连接(连接 emsc 在上一步中已经创建了)
选择方言
###3. 使用 Hibernate Code Generation Configurations 自动生成实体
选择 上一步中创建好的 Console Configuration,填写包名
选择要生成的的文件类型
会有一个 “The serializable class SdUser does not declare a static final serialVersionUID field of type long” 的警告
用 eclipse 自动处理这个警告,生成一个 serial version ID 即可
完成
##错误解决
Problems while reading database schema
org.hibernate.HibernateException: could not instantiate RegionFactory
换个项目没有问题。jar 冲突。换不了jar 就再另外一个项目里面把bean ,xml 给生成完了再把代码移回原项目
##参考
1.将EEMS
库中的Dec_TownInfo
表中的数据 复制到 OEM
库的c_townInfo
中(c_townInfo
表事先存在),先要将表的主键设为自增长类型,且列出列名
SET IDENTITY_INSERT [OEM].[dbo].[c_townInfo] ON
insert into [OEM].[dbo].[c_townInfo] (id,name,city_id,code,logo) select * FROM [EEMS].[dbo].[Dec_TownInfo]
2.将EEMS
库中的Dec_TownInfo
表中的数据 复制到 OEM
库的c_townInfo
中(c_townInfo
表事先不存在)
SELECT * INTO [OEM].[dbo].[c_townInfo] FROM [EEMS].[dbo].[Dec_TownInfo]
#设置环境变量 变量名:CATALINA_HOME 变量值:tomcat 安装的路径,如 “C:\apache-tomcat-8.0.9”
#安装 service服务 :
打开命令行提示符窗口
=> 进入Tomcat安装目录==> 进入bin目录下==>
输入:service.bat install
即可
#在eclipse里面配置tomcat,如下图:
本例运行演示了用 Jersey 构建 RESTful 服务中,如何集成 angular,用MVC分层的方式访问 RESTful 服务。
1.完成项目结构
创建相应的目录结构
angularjs 、bootstrap 的js,css文件放别放入相应的目录,
在js目录下再创建 app.js
、controller.js
在partials目录下再创建 create.html
、 list.html
、 detail.html
完整目录结构如下
list.html
填入如下内容,主要是显示用户列表ng-repeat
为 angularjs 迭代器
``作用是数据绑定:
<div class="pull-right">
<a href="#/create" class="btn btn-default" title="Create"><span class="glyphicon glyphicon-plus"></span></a>
</div>
<div class="page-header">
<h3>Users</h3>
</div>
<hr />
<li ng-repeat="user in users | filter:query | orderBy:orderProp" >
<div class="pull-right">
<a href="#/users/" class="btn btn-xs btn-default" title="edit">
<span class="glyphicon glyphicon-pencil"></span></a>
</div>
<h4>userId: </h4>
<p>userName:<a href="#/users/"></a> Age:</p>
<hr />
</li>
<hr />
create.html
用来添加用户信息,ng-model
是模型
<div class="page-header">
<h3>Create</h3>
</div>
<form role="form" name="userForm">
<div class="row"> </div>
<div class="row" ng-class="{'has-error': userForm.userId.$invalid}">
<div class="col-md-1">
<i ng-show="userForm.url.$error.required"
class="glyphicon glyphicon-pencil"></i>
<label for="urlInput">userId</label>
</div>
<div class="col-md-4">
<input
type="test"
class="form-control" id="urlInput"
name="userId" ng-model="user.userId" required>
</div>
</div>
<div class="row"> </div>
<div class="row" ng-class="{'has-error': userForm.userName.$invalid}">
<div class="col-md-1">
<i ng-show="userForm.userName.$error.required"
class="glyphicon glyphicon-pencil"></i>
<label for="nameInput">userName</label>
</div>
<div class="col-md-4">
<input
type="text"
class="form-control error" id="nameInput"
name="userName"
ng-model="user.userName"
required>
</div>
</div>
<div class="row"> </div>
<div class="row" ng-class="{'has-error': userForm.url.$invalid}">
<div class="col-md-1">
<i ng-show="userForm.url.$error.required"
class="glyphicon glyphicon-pencil"></i>
<label for="urlInput">age</label>
</div>
<div class="col-md-4">
<input
type="text"
class="form-control" id="urlInput"
name="age" ng-model="user.age" required>
</div>
</div>
<div class="row" ng-hide="showConfirm">
<div class="col-md-5">
<a href="#users" class="btn">Cancel</a>
<button
ng-click="add()"
ng-disabled="isClean() || userForm.$invalid"
class="btn btn-primary">Save</button>
</div>
</div>
detail.html
用来显示用户信息并提供修改、删除等功能
<form role="form" name="userForm">
<div class="row"> </div>
<div class="row" ng-class="{'has-error': userForm.userId.$invalid}">
<div class="col-md-1">
<i ng-show="userForm.url.$error.required"
class="glyphicon glyphicon-pencil"></i>
<label for="urlInput">userId</label>
</div>
<div class="col-md-4">
<input
type="test"
class="form-control" id="urlInput"
name="userId" ng-model="user.userId" required>
</div>
</div>
<div class="row"> </div>
<div class="row" ng-class="{'has-error': userForm.userName.$invalid}">
<div class="col-md-1">
<i ng-show="userForm.userName.$error.required"
class="glyphicon glyphicon-pencil"></i>
<label for="nameInput">userName</label>
</div>
<div class="col-md-4">
<input
type="text"
class="form-control error" id="nameInput"
name="userName"
ng-model="user.userName"
fend-focus="focusUserNameeInput"
required>
</div>
</div>
<div class="row"> </div>
<div class="row" ng-class="{'has-error': userForm.url.$invalid}">
<div class="col-md-1">
<i ng-show="userForm.url.$error.required"
class="glyphicon glyphicon-pencil"></i>
<label for="urlInput">age</label>
</div>
<div class="col-md-4">
<input
type="text"
class="form-control" id="urlInput"
name="age" ng-model="user.age" required>
</div>
</div>
<div class="row" ng-hide="showConfirm"> </div>
<div class="row" ng-hide="showConfirm">
<div class="col-md-5">
<a href="#users" class="btn">Cancel</a>
<button
ng-click="save()"
ng-disabled="isClean() || userForm.$invalid"
class="btn btn-primary">Save</button>
<button
ng-click="remove()"
ng-show="user.userId"
class="btn btn-danger">Delete</button>
</div>
</div>
</form>
index.html
作为主页面,嵌入其他子页面,ng-app
声明这个是模块,ng-controller
说明他的控制器叫ListCtrl
,ng-view
用来存放子视图(页面)。
<!doctype html>
<html ng-app="appMain" ng-controller="ListCtrl">
<head>
<meta charset="utf-8"/>
<meta name="viewport" content="width=device-width, initial-scale=1.0">
<link rel="stylesheet" href="css/bootstrap.min.css" type="text/css"/>
</head>
<body >
<!-- navbar -->
<div class="container ng-view"></div>
<!-- footer -->
<div id="footer" class="hidden-xs">
<div class="container">
<p class="text-muted">
Project Example - by <a href="http://www.waylau.com" target="_blank">www.waylau.com</a> |
<a href="https://github.com/waylau" target="_blank">GitHub Project</a>
</p>
</div>
</div>
<script src="js/bootstrap-3.1.1.min.js"></script>
<script src="js/angular-1.2.3.js"></script>
<script src="js/angular-resource-1.2.3.js"></script>
<script src="js/angular-route-1.2.3.js"></script>
<script src="js/angular-cookies-1.2.3.js"></script>
<script src="js/app.js"></script>
<script src="js/controller.js"></script>
</body>
</html>
app.js
,声明模块appMain
,提供路由功能,说明了调转到哪个页面,用哪个控制器
angular.module('appMain', ['ngRoute']).config(['$routeProvider', function ($routeProvider) {
$routeProvider.
when('/users', {templateUrl: 'partials/list.html', controller: ListCtrl}).
when('/users/:userId', {templateUrl: 'partials/detail.html', controller: DetailCtrl}).
when('/create', {
templateUrl: 'partials/create.html',
controller: CreateController
}).
otherwise({redirectTo: '/users'});
}]);
controller.js
,控制器。主要是对业务逻辑的操作,常见的CURD功能,http访问RESTful接口,并且返回数据
var url = 'http://localhost:8089/RestDemo/rest';
function ListCtrl($scope, $http) {
$http.get( url + '/users' ).success(function(data) {
$scope.users = data;
});
$scope.orderProp = 'age';
}
function DetailCtrl($scope, $routeParams, $http) {
$http.get( url + '/users/'+$routeParams.userId).success(function(data) {
$scope.user = data;
});
$scope.save = function() {
$http.put( url + '/users', $scope.user).
success(function(data, status, headers, config){
$location.path('/');
}).error(function(data, status, headers, config){
alert("error"+status);
}) ;
};
$scope.remove = function(){
$http({
method:'DELETE',
url: url + '/users/'+ $scope.user.userId ,
})
.success(function(data, status, headers, config){
$location.path('/');
}).error(function(data, status, headers, config){
alert("error"+status);
}) ;
};
}
function CreateController($scope, $http) {
$scope.add = function() {
$http.post( url + '/users', $scope.user).
success(function(data, status, headers, config){
$location.path('/');
}).error(function(data, status, headers, config){
alert("error"+status);
}) ;
};
}
1.先运行项目
2.可以进行CURD操作
PS:本案例力求简单把 angularjs 访问 RESTful 服务展示出来,在Chrome,firefox,IE上做过测试。
#一、总体说明
本例运行演示了用 Jersey 构建 RESTful 服务中,如何集成 jQuery,用html作为客户端访问 RESTful 服务。
#二、环境
WebContent
创建js
,css
两个目录,并把jQuery 库 放入js
目录下,并在该目录下创建main,js
空文件WebContent
创建index.html
: <!DOCTYPE HTML>
<html>
<head>
<title>jquery Demo (人员管理系统)</title>
<meta charset="utf-8"/>
<link rel="stylesheet" href="css/styles.css" />
<script src="js/jquery-1.7.1.min.js"></script>
<script src="js/main.js"></script>
</head>
<body>
<div class="header">
<button id="btnClear">Clear</button>
<button id="btnRefreash">Refreash</button>
更多实例访问:<a href="http://www.waylau.com" >www.waylau.com</a>
</div>
<div class="leftArea">
<ul id="userList"></ul>
</div>
<form id="wineForm">
<div class="mainArea">
<label>Id:</label> <input id="userId" name="userId" type="text" required/>
<label>Name:</label> <input type="text" id="userName" name="userName" required>
<label>Age:</label> <input type="text" id="age" name="age" required/>
<button id="btnAdd">Add</button>
<button id="btnSave">Save</button>
<button id="btnDelete">Delete</button>
</div>
</form>
</body>
</html>
main.js
// The root URL for the RESTful services
var rootURL = 'http://localhost:8089/RestDemo/rest/users';
var currentUser;
// Retrieve wine list when application starts
findAll();
// Nothing to delete in initial application state
$('#btnDelete').hide();
$('#btnAdd').click(function() {
addUser();
return false;
});
$('#btnSave').click(function() {
updateUser();
return false;
});
$('#btnClear').click(function() {
newUser();
return false;
});
$('#btnDelete').click(function() {
deleteUser();
return false;
});
$('#userList a').live('click', function() {
findById($(this).data('identity'));
});
$('#btnRefreash').click(function() {
findAll();
return false;
});
function newUser() {
$('#btnDelete').hide();
currentUser = {};
renderDetails(currentUser); // Display empty form
}
function findAll() {
console.log('findAll');
$.ajax({
type: 'GET',
url: rootURL,
dataType: "json", // data type of response
success: renderList
});
}
function findById(id) {
console.log('findById: ' + id);
$.ajax({
type: 'GET',
url: rootURL + '/' + id,
dataType: "json",
success: function(data){
$('#btnDelete').show();
console.log('findById success: ' + data.userName);
currentUser = data;
renderDetails(currentUser);
}
});
}
function addUser() {
console.log('addUser');
$.ajax({
type: 'POST',
contentType: 'application/json',
url: rootURL,
dataType: "json",
data: formToJSON(),
success: function(data, textStatus, jqXHR){
alert('User created successfully');
$('#btnDelete').show();
$('#userId').val(data.userId);
},
error: function(jqXHR, textStatus, errorThrown){
alert('addUser error: ' + textStatus);
}
});
}
function updateUser() {
console.log('updateUser');
$.ajax({
type: 'PUT',
contentType: 'application/json',
url: rootURL,
dataType: "json",
data: formToJSON(),
success: function(data, textStatus, jqXHR){
alert('User updated successfully');
},
error: function(jqXHR, textStatus, errorThrown){
alert('updateUser error: ' + textStatus);
}
});
}
function deleteUser() {
console.log('deleteUser');
$.ajax({
type: 'DELETE',
url: rootURL + '/' + $('#userId').val(),
success: function(data, textStatus, jqXHR){
alert('user deleted successfully');
},
error: function(jqXHR, textStatus, errorThrown){
alert('delete user error');
}
});
}
function renderList(data) {
// JAX-RS serializes an empty list as null, and a 'collection of one' as an object (not an 'array of one')
var list = data == null ? [] : (data instanceof Array ? data : [data]);
$('#userList li').remove();
$.each(list, function(index, data) {
$('#userList').append('<li><a href="#" data-identity="' + data.userId + '">'+data.userName+'</a></li>');
});
}
function renderDetails(data) {
$('#userId').val(data.userId);
$('#userName').val(data.userName);
$('#age').val(data.age);
}
// Helper function to serialize all the form fields into a JSON string
function formToJSON() {
var userId = $('#userId').val();
return JSON.stringify({
"userId": userId == "" ? null : userId,
"userName": $('#userName').val(),
"age": $('#age').val()
});
}
css
目录下创建styles.css
文件 * {
font-family: "Helvetica Neue", Helvetica, Arial, sans-serif;
font-size: 18px;
}
.header {
padding-top: 5px;
}
.leftArea {
position: absolute;
left: 10px;
top: 70px;
bottom: 20px;
width: 260px;
border:solid 1px #CCCCCC;
overflow-y: scroll;
}
.mainArea {
position: absolute;
top: 70px;
bottom: 20px;
left:300px;
overflow-y: scroll;
width:300px;
}
.rightArea {
position: absolute;
top: 70px;
bottom: 20px;
left:650px;
overflow-y: scroll;
width:270px;
}
ul {
list-style-type: none;
padding-left: 0px;
margin-top: 0px;
}
li a {
text-decoration:none;
display: block;
color: #000000;
border-bottom:solid 1px #CCCCCC;
padding: 8px;
}
li a:hover {
background-color: #4B0A1E;
color: #BA8A92;
}
input, textarea {
border:1px solid #ccc;
min-height:30px;
outline: none;
}
.mainArea input {
margin-bottom:15px;
margin-top:5px;
width:280px;
}
textarea {
margin-bottom:15px;
margin-top:5px;
height: 200px;
width:250px;
}
label {
display:block;
}
button {
padding:6px;
}
#searchKey {
width:160px;
}
#四、运行 1.先运行项目
2.可以进行CURD操作
PS:本案例力求简单把jquery访问 RESTful 服务展示出来,代码只在Chrome上做过测试。
本章源码:https://github.com/waylau/RestDemo/tree/master/jersey-demo8-sqlserver-hibernate-spring3-jquery
1.Spring 4
唯一的外部强制性的依库是 jakarta commons-logging
2.Spring 4
与可选的第三方库一般只支持在2010年底或后来发布的版本:特别是,Hibernate 3.6+
, EhCache 2.1+
, Quartz 1.8+
, Groovy 1.8+
, and Joda-Time 2.0+
。作为另外,Spring 4
要求最近的Hibernate Validator 4.3 +
,并支持Jackson 2.0+
(Jackson 1.8/1.9
只保留对 Spring 3.2
支持;现在是处在废弃的状态)。
3.Spring 4
对低支持到 JDK 6 update 18
,在新项目中,最好用Java 7/8
.
4.Java EE 6/7
现在被认为是Spring 4
的最低标准。建议使用JPA 2
和Servlet 3
规范。为了兼容Google
App Engine
和老旧的应用,它可以部署 Spring4
应用到servlet
2.5
环境。然而,强烈建议用 Servlet 3+
作为测试环境
5.Gradle
作为项目构建工具
参考:spring-framework-reference (v4.0.6Release)
#一、总体说明
本例运行演示了用 Jersey 构建 RESTful 服务中,如何集成 Spring3
#二、环境
#三、配置
1.根目录下下创建 Spring 的配置文件applicationContext.xml
;
配置如下:
<?xml version=”1.0” encoding=”UTF-8”?>
<beans xmlns="http://www.springframework.org/schema/beans"
xmlns:xsi="http://www.w3.org/2001/XMLSchema-instance"
xmlns:context="http://www.springframework.org/schema/context"
xsi:schemaLocation="http://www.springframework.org/schema/beans
http://www.springframework.org/schema/beans/spring-beans.xsd
http://www.springframework.org/schema/context
http://www.springframework.org/schema/context/spring-context.xsd"
>
<!-- 激活那些已经在g容器里注册过的bean -->
<context:annotation-config></context:annotation-config>
<!-- 在容器中注入bean -->
<bean id="UserServiceImpl" class="com.waylau.rest.service.impl.UserServiceImpl"/>
<bean id="UserDaoImpl" class="com.waylau.rest.dao.impl.UserDaoImpl"/>
</beans>
2.在com.waylau.rest.service
和com.waylau.rest.service.impl
下分别增加 UserService 和 UserServiceImpl。
UserService.java
package com.waylau.rest.service;
import java.util.List;
import com.waylau.rest.bean.User;
/**
* User Service 接口
* @author waylau.com
* 2014-7-25
*/
public interface UserService {
public User getUserById(String id);
public boolean deleteUserById(String id);
public boolean createUser(User user);
public boolean updateUser(User user);
public List<User> getAllUsers();
}
UserServiceImpl.java
package com.waylau.rest.service.impl;
import java.util.List;
import org.springframework.beans.factory.annotation.Autowired;
import com.waylau.rest.bean.User;
import com.waylau.rest.dao.impl.UserDaoImpl;
import com.waylau.rest.service.UserService;
/**
* User Service 接口实现
* @author waylau.com
* 2014-7-25
*/
public class UserServiceImpl implements UserService {
@Autowired
private UserDaoImpl userDaoImpl;
public UserServiceImpl() {
// TODO Auto-generated constructor stub
}
@Override
public User getUserById(String id) {
return userDaoImpl.getUserById(id);
}
@Override
public boolean deleteUserById(String id) {
return userDaoImpl.deleteUserById(id);
}
@Override
public boolean createUser(User user) {
return userDaoImpl.createUser(user);
}
@Override
public boolean updateUser(User user) {
return userDaoImpl.updateUser(user);
}
@Override
public List<User> getAllUsers() {
return userDaoImpl.getAllUsers();
}
}
3.修改 UserResource.java
package com.waylau.rest.resources;
import java.util.ArrayList;
import java.util.List;
import java.util.logging.Logger;
import javax.ws.rs.Path;
import javax.ws.rs.Produces;
import javax.ws.rs.Consumes;
import javax.ws.rs.PathParam;
import javax.ws.rs.core.MediaType;
import javax.ws.rs.DELETE;
import javax.ws.rs.GET;
import javax.ws.rs.POST;
import javax.ws.rs.PUT;
import org.springframework.beans.factory.annotation.Autowired;
import com.waylau.rest.bean.User;
import com.waylau.rest.service.impl.UserServiceImpl;
/**
* 用户资源
* @author waylau.com
* 2014-7-26
*/
@Path("/users")
public class UserResource {
private static final Logger LOGGER = Logger.getLogger(UserResource.class.getName());
@Autowired
private UserServiceImpl userServiceImpl;
public UserResource() {
LOGGER.fine("UserResource()");
}
/**
* 增加
* @param user
*/
@POST
@Consumes({MediaType.APPLICATION_XML, MediaType.APPLICATION_JSON})
public void createUser(User user)
{
userServiceImpl.createUser(user);
}
/**
* 删除
* @param id
*/
@DELETE
@Path("{id}")
public void deleteUser(@PathParam("id")String id){
userServiceImpl.deleteUserById(id);
}
/**
* 修改
* @param user
*/
@PUT
@Consumes(MediaType.APPLICATION_XML)
public void updateUser(User user){
userServiceImpl.updateUser(user);
}
/**
* 根据id查询
* @param id
* @return
*/
@GET
@Path("{id}")
@Produces({MediaType.APPLICATION_XML, MediaType.APPLICATION_JSON})
public User getUserById(@PathParam("id") String id){
User u = userServiceImpl.getUserById(id);
return u;
}
/**
* 查询所有
* @return
*/
@GET
@Produces({MediaType.APPLICATION_XML, MediaType.APPLICATION_JSON})
public List<User> getAllUsers(){
List<User> users = new ArrayList<User>();
users = userServiceImpl.getAllUsers();
return users;
}
}
4.修改web.xml,插入
<module-name>RestDemo</module-name>
<listener>
<listener-class>org.springframework.web.context.ContextLoaderListener</listener-class>
</listener>
<context-param>
<param-name>contextConfigLocation</param-name>
<param-value>classpath:applicationContext.xml</param-value>
</context-param>
#四、运行 1.先运行项目
2.运行UserClient.java测试,控制台输出如下
****增加用户addUser****
****查询所有getAllUsers****
[{"userId":"002","userName":"sdfs","age":"23"},{"userId":"003","userName":"sdfs","age":"23"},{"userId":"004","userName":"sdfs","age":"23"},{"userId":"005","userName":"sdfs","age":"23"},{"userId":"006","userName":"Susan","age":"21"},{"userId":"007","userName":"sdfs","age":"23"},{"userId":"ds","userName":"ds","age":"ds"}]
****修改用户updateUser****
****根据id查询用户****
006Susan33
****查询所有getAllUsers****
[{"userId":"002","userName":"sdfs","age":"23"},{"userId":"003","userName":"sdfs","age":"23"},{"userId":"004","userName":"sdfs","age":"23"},{"userId":"005","userName":"sdfs","age":"23"},{"userId":"006","userName":"Susan","age":"33"},{"userId":"007","userName":"sdfs","age":"23"},{"userId":"ds","userName":"ds","age":"ds"}]
****删除用户****
****查询所有getAllUsers****
[{"userId":"002","userName":"sdfs","age":"23"},{"userId":"003","userName":"sdfs","age":"23"},{"userId":"004","userName":"sdfs","age":"23"},{"userId":"005","userName":"sdfs","age":"23"},{"userId":"007","userName":"sdfs","age":"23"},{"userId":"ds","userName":"ds","age":"ds"}]
本章源码(含jar包):https://github.com/waylau/RestDemo/tree/master/jersey-demo7-sqlserver-hibernate-spring3
#综述 本文演示了用Maven编译Java项目
#需要
#创建项目 本例主要为了展示Maven,所以Java的项目力求简单。
#创建项目结构 选择一个项目目录,在 *nix系统上使用下面语句
mkdir -p src/main/java/hello
window下使用命令
mkdir src\main\java\hello
创建如下结构:
└── src
└── main
└── java
└── hello
在src/main/java/hello
目录下创建Java文件HelloWorld.java
和 Greeter.java
src/main/java/hello/HelloWorld.java
package hello;
public class HelloWorld {
public static void main(String[] args) {
Greeter greeter = new Greeter();
System.out.println(greeter.sayHello());
}
}
src/main/java/hello/Greeter.java
package hello;
public class Greeter {
public String sayHello() {
return "Hello world!";
}
}
现在项目完成,可以用Maven编译了。有关Maven的安装,可以参考Apache Maven 3.1.0 安装、部署、使用
#定义简单的Maven编译
首先,在项目的根目录下创建一个Maven项目定义文件pom.xml
,该文件主要是说明项目的名称、版本和依赖库
pom.xml
<?xml version="1.0" encoding="UTF-8"?>
<project xmlns="http://maven.apache.org/POM/4.0.0" xmlns:xsi="http://www.w3.org/2001/XMLSchema-instance"
xsi:schemaLocation="http://maven.apache.org/POM/4.0.0 http://maven.apache.org/maven-v4_0_0.xsd">
<modelVersion>4.0.0</modelVersion>
<groupId>org.springframework</groupId>
<artifactId>gs-maven</artifactId>
<packaging>jar</packaging>
<version>0.1.0</version>
<build>
<plugins>
<plugin>
<groupId>org.apache.maven.plugins</groupId>
<artifactId>maven-shade-plugin</artifactId>
<version>2.1</version>
<executions>
<execution>
<phase>package</phase>
<goals>
<goal>shade</goal>
</goals>
<configuration>
<transformers>
<transformer
implementation="org.apache.maven.plugins.shade.resource.ManifestResourceTransformer">
<mainClass>hello.HelloWorld</mainClass>
</transformer>
</transformers>
</configuration>
</execution>
</executions>
</plugin>
</plugins>
</build>
</project>
除了<packaging> 元素可选外,其他的元素是构成pom.xml
文件的最基本的元素了。它包括以下几个项目的配置:
#编译Java代码 运行下面语句编译
mvn compile
编译完成的.class
文件将会出现在target/classes
目录下.如下图
运行项目:
mvn exec:java -Dexec.mainClass="hello.HelloWorld"
输出如下:
如果不想直接运行.class
文件,可以将其打包:
mvn package
打包完成后,会在target
目录下生成一个JAR文件,文件名由<artifactId> 和 <version>组成。比如本例,将会根据pom.xml
生成gs-maven-0.1.0.jar
如果你想安装您的项目的JAR文件到本地Maven仓库,那么你应该调用下面语句:
mvn install
此时,你的项目代码将会经过编译、测试、打包并拷贝到本地依赖库,提供给其他项目引用。
以上例子源码的地址https://github.com/waylau/maven-demo中的demo1
说到项目依赖,下面说下声明依赖
#声明依赖 上面的例子比较简单,没有用到其他库。但是真实的项目可能会引用(依赖)到很多其他库。
下面例子,依赖了Joda Time
的库。
修改src/main/java/hello/HelloWorld.java
package hello;
import org.joda.time.LocalTime;
public class HelloWorld {
public static void main(String[] args) {
LocalTime currentTime = new LocalTime();
System.out.println("The current local time is: " + currentTime);
Greeter greeter = new Greeter();
System.out.println(greeter.sayHello());
}
}
现在运行mvn compile
将会报错,因为没有声明依赖。在 <project> 节点下插入如下:
<dependencies>
<dependency>
<groupId>joda-time</groupId>
<artifactId>joda-time</artifactId>
<version>2.2</version>
</dependency>
</dependencies>
这段内容就声明了项目的依赖。每个依赖节点<dependency>都由三个子节点组成:
在POM 4中,<dependency> 中还引入了<scope> ,它主要管理依赖的部署。目前<scope> 可以使用5个值:
现在你运行mvn compile
或者mvn package
,Maven会自动下载相关依赖。
完整的pom.xml
<?xml version="1.0" encoding="UTF-8"?>
<project xmlns="http://maven.apache.org/POM/4.0.0" xmlns:xsi="http://www.w3.org/2001/XMLSchema-instance"
xsi:schemaLocation="http://maven.apache.org/POM/4.0.0 http://maven.apache.org/maven-v4_0_0.xsd">
<modelVersion>4.0.0</modelVersion>
<groupId>org.springframework</groupId>
<artifactId>gs-maven</artifactId>
<packaging>jar</packaging>
<version>0.1.0</version>
<!-- tag::joda[] -->
<dependencies>
<dependency>
<groupId>joda-time</groupId>
<artifactId>joda-time</artifactId>
<version>2.2</version>
</dependency>
</dependencies>
<!-- end::joda[] -->
<build>
<plugins>
<plugin>
<groupId>org.apache.maven.plugins</groupId>
<artifactId>maven-shade-plugin</artifactId>
<version>2.1</version>
<executions>
<execution>
<phase>package</phase>
<goals>
<goal>shade</goal>
</goals>
<configuration>
<transformers>
<transformer
implementation="org.apache.maven.plugins.shade.resource.ManifestResourceTransformer">
<mainClass>hello.HelloWorld</mainClass>
</transformer>
</transformers>
</configuration>
</execution>
</executions>
</plugin>
</plugins>
</build>
</project>
运行项目:
mvn exec:java -Dexec.mainClass="hello.HelloWorld"
输出如下:
以上例子源码的地址https://github.com/waylau/maven-demo中的demo2
参考:http://spring.io/guides/gs/maven/
http://www.vineetmanohar.com/2009/11/3-ways-to-run-java-main-from-maven/