使用 Webix 创建 Email 客户端
Webix 是一个JavaScript UI 库,提供了多达88个UI小部件和功能丰富的 CSS/HTML5 JavaScript 控件。使用 Webix 可以有效地加快 Web 应用的开发。文本将演示了如何通过 Webix 框架,来创建一个 Email 客户端原型。
安装 Webix
可以下载 Webix 的 JS、CSS 文件,但最快的方式是使用 Webix 的 CDN, 如下:
<!DOCTYPE HTML>
<html>
    <head>
    <link rel="stylesheet" href="http://cdn.webix.com/edge/webix.css" type="text/css">
    <script src="http://cdn.webix.com/edge/webix.js" type="text/javascript"></script>
    </head>
    ...
</html>
快速开始
我们为我们的第一个应用创建第一个页面 index.html。在 <body> 中定义 js 脚本,来放置 UI 配置:
<!DOCTYPE HTML>
<html>
    <head>
    <link rel="stylesheet" href="http://cdn.webix.com/edge/webix.css" type="text/css">
    <script src="http://cdn.webix.com/edge/webix.js" type="text/javascript"></script>
    </head>
    <body>
        <script type="text/javascript" charset="utf-8">
        /*  UI 配置 */
        </script>
    </body>
</html>
接着,我们编写 UI 配置:
webix.ui({
    rows: [
        {
            view: "template",
            type: "header",
            template: "我的应用!"
        },
        {
            view: "datatable",
            autoConfig: true,
            data: [
                { title: "Way Lau", year: 1987, votes: 533848, rating: 8.9, rank: 5 },
                { title: "老卫", year: 1987, votes: 53248, rating: 5.9, rank: 6 }
            ]
        }
    ]
});
为了能更加友好显示中文,我们在<head>标签里面加上<meta charset="UTF-8">。
这样,我们完整的第一个应用的代码如下:
<!DOCTYPE HTML>
<html>

<head>
    <meta charset="UTF-8">
    <link rel="stylesheet" href="http://cdn.webix.com/edge/webix.css" type="text/css">
    <script src="http://cdn.webix.com/edge/webix.js" type="text/javascript"></script>
</head>

<body>
    <script type="text/javascript" charset="utf-8">
        /*  UI 配置 */
        webix.ui({
            rows: [
                {
                    view: "template",
                    type: "header",
                    template: "我的应用!"
                },
                {
                    view: "datatable",
                    autoConfig: true,
                    data: [
                        { title: "Way Lau", year: 1987, votes: 533848, rating: 8.9, rank: 5 },
                        { title: "老卫", year: 1987, votes: 53248, rating: 5.9, rank: 6 }
                    ]
                }
            ]
        });
    </script>
</body>

</html>
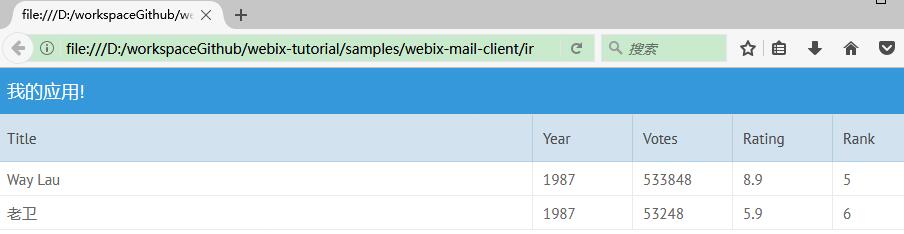
用浏览器直接打开我们的index.html 页面,可以看到如下效果:
探索项目
那么,我们来简单介绍下 Webix 的原理。
Webix 的应用程序都是放置在 script 脚本中:
webix.ui({
  // 组件
});
需要注意的是,如果想让 Webix 脚本在 HTML 文档加载完了再执行,可以使用 webix.ready(function(){ ....}) 来包裹我们的 Webix,用法如下:
webix.ready(function(){
  webix.ui({
      ....
  });
});
下面代码是用 Webix 中的 view 来定义一个视图组件,多个 view 可以实现复杂的应用布局结构:
rows: [
    {
        view: "template",
        type: "header",
        template: "我的应用!"
    },
    {
        view: "datatable",
        autoConfig: true,
        data: [
            { title: "Way Lau", year: 1987, votes: 533848, rating: 8.9, rank: 5 },
            { title: "老卫", year: 1987, votes: 53248, rating: 5.9, rank: 6 }
        ]
    }
]
在上述例子中,我们用到了两种类型的 view,其中,
rows代码垂直布局的多个列,这个,我们每个行(row)就是一个view;- ui.template 是一个用于包裹 HTML 内容的容器。这里我们用来类型为
header的template来说明这个是应用头。更多template的类型,可以自行参阅https://docs.webix.com/samples/80_docs/template_types.html; - ui.datatable 是一个功能丰富的数据表格组件;
- autoConfig 设置为 true,表明表格会根据数据来自适应;
- data 就是表格中放置的数据
进阶
在快速了解 Webix 的相关概念之后,我们就要来创建一个稍微复杂一点的应用,就是本文的主要内容“Email 客户端”。
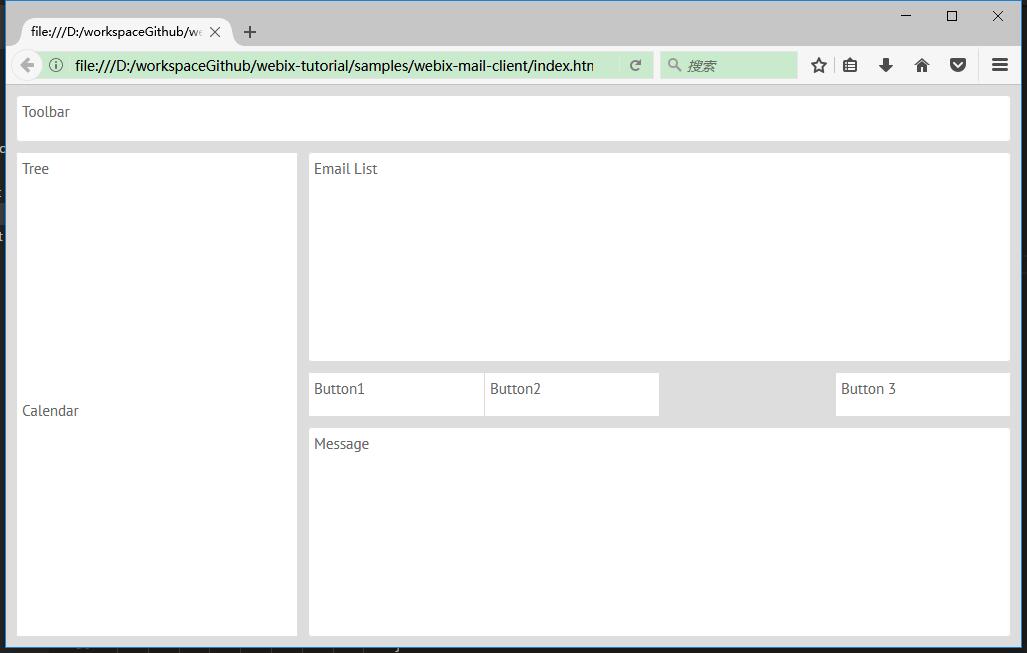
布局
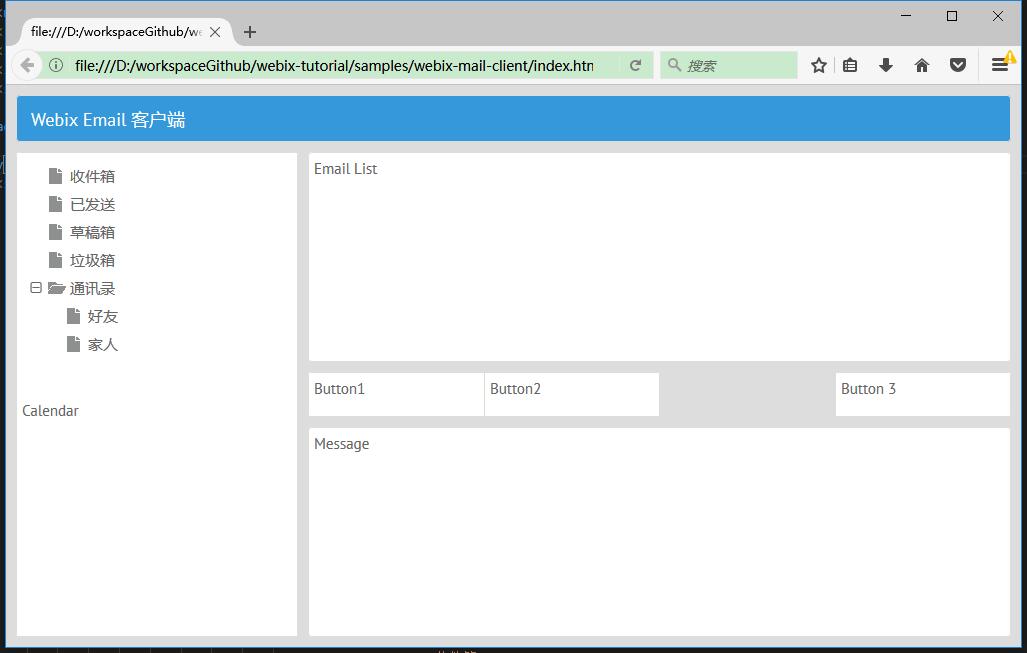
从大布局开始,再逐步求精,是构建前端应用的基本思路。我们创建了如下布局结构:
webix.ui({
    type: "space",
    rows: [
        /* 1st row. Toolbar */
        {
            template: "Toolbar",
            height: 45,

        },
        /* 2nd row. The rest of application */
        {
            type: "wide",
            cols: [
                /* 1st column of the second row.
                /* Folder tree and Calendar */
                {
                    type: "clean",
                    rows: [
                        {
                            template: "Tree",
                            width: 280
                        },
                        {
                            template: "Calendar"
                        }
                    ]
                },
                /* 2nd column of the second row.
                /* Email list, Buttons, and Message reader */
                {
                    type: "wide",
                    rows: [
                        { template: "Email List" },
                        {
                            height: 45, cols: [
                                { template: "Button1" },
                                { template: "Button2" },
                                {},
                                { template: "Button 3" }
                            ]
                        },
                        { template: "Message" }
                    ]
                }
            ]
        }
    ]
});
其中:
- cols 就是列,每行(row)可能包含了多个列(col);
- height 和 width 属性来定义视图所需的大小了
- type,它定义了布局边框。如果使用
clean将获得无边框的单元格,使用wide将获得有边框的、有更大空间的单元格。
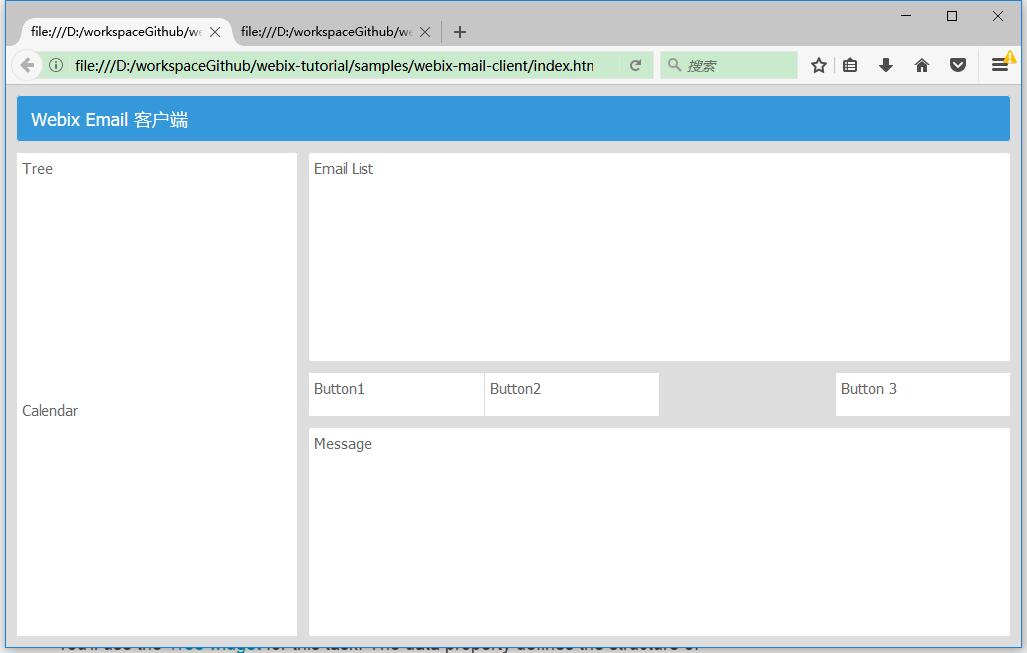
实现 Toolbar
Toolbar(工具栏)可以包含各种元素,如按钮或下拉菜单等。
记住,要使用Webix创建组件,必须使用view:“component_name”代码行,元素属性允许选择工具栏的内容。
...
{
    view: "toolbar",
    height: 45,
    elements:[
        {view: "label", label: "Webix Email 客户端"}
    ]
},
...
- elements 用来放置子的
view组件。 - label 就是显示普通的文本标签
这里,我们使用了 ui.chart,来创建图表。
实现 Tree
创建菜单目录树:
...
{
    view:"tree",
    id: "my_tree",
    select: true,
    width:280,
    data:[
        { id:"1", value:"收件箱"},
        { id:"2", value:"已发送"},
        { id:"3", value:"草稿箱"},
        { id:"4", value:"垃圾箱"},
        { id:"5", value:"通讯录", open:true,
            data:[
                { id:"5-1", value:"好友"},
                { id:"5-2", value:"家人"}
            ]
        }
    ]
},
...
其中:
- tree 是一个功能丰富的树形组件;
- open 设置为 true,来让我们的树在初始化时就处于打开状态。
最终效果如下:
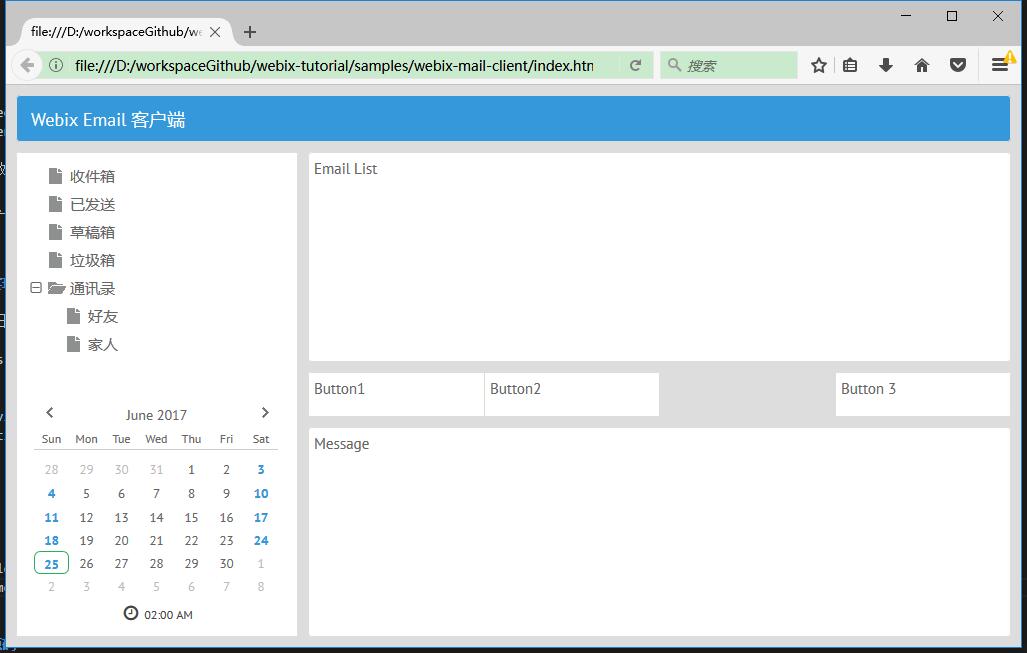
实现 Calendar
创建日历组件:
...
{
    view:"calendar",
    timepicker:true
},
...
其中:
- calendar 是一个功能丰富的日历组件;
- timepicker 设置为 true,在日历上显示时间选择器。
最终效果如下:
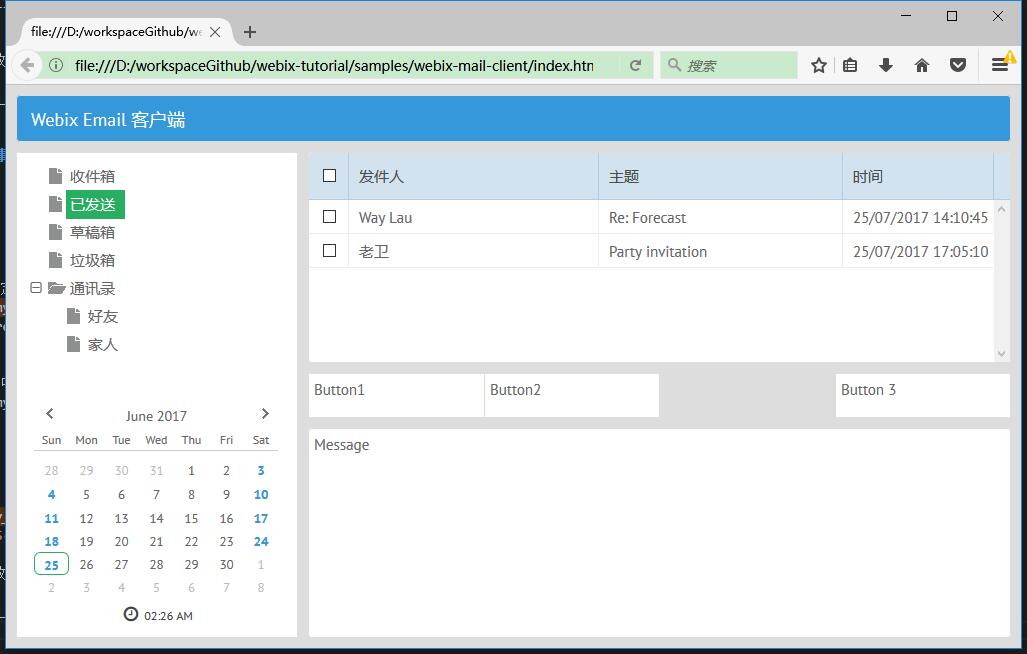
实现 Email 列表
还记得我们的在“快速开始”部分的那个表格吗?这里同样需要用表格来实现 Email 列表:
创建Email 列表:
...
 {
    id: "my_datatable",
    view: "datatable",
    scrollX: false,
    columns: [
        {
            id: "checked", header: { content: "masterCheckbox" },
            template: "{common.checkbox()}", width: 40
        },
        { id: "name", width: 250, header: "发件人" },
        { id: "subject", header: "主题", fillspace: true },
        { id: "date", header: "时间", width: 150 }
    ],
    data: [
        {
            id: 1, folder: 1, name: "Way Lau",
            email: "[email protected]", subject: "Invitation",
            date: "25/07/2017 12:30:20"
        },
        {
            id: 2, folder: 1, name: "老卫",
            email: "[email protected]", subject: "Report",
            date: "25/07/2017 16:10:07"
        },
        {
            id: 11, folder: 2, name: "Way Lau",
            email: "[email protected]", subject: "Re: Forecast",
            date: "25/07/2017 14:10:45"
        },

        {
            id: 12, folder: 2, name: "老卫",
            email: "[email protected]", subject: "Party invitation",
            date: "25/07/2017 17:05:10"
        }
    ]
    },
...
其中:
- columns 用来定义表头;
- ` header:{ content:”masterCheckbox” }` 定义了可以全选列表的 checkbox;
template:"{common.checkbox()}"设置每个列表项都会带有一个 checkbox;- scrollX 设置为 false,意味着禁用了水平的滚动条。
- fillspace 设置为 true,意味可以自动填充宽度。
最终效果如下:
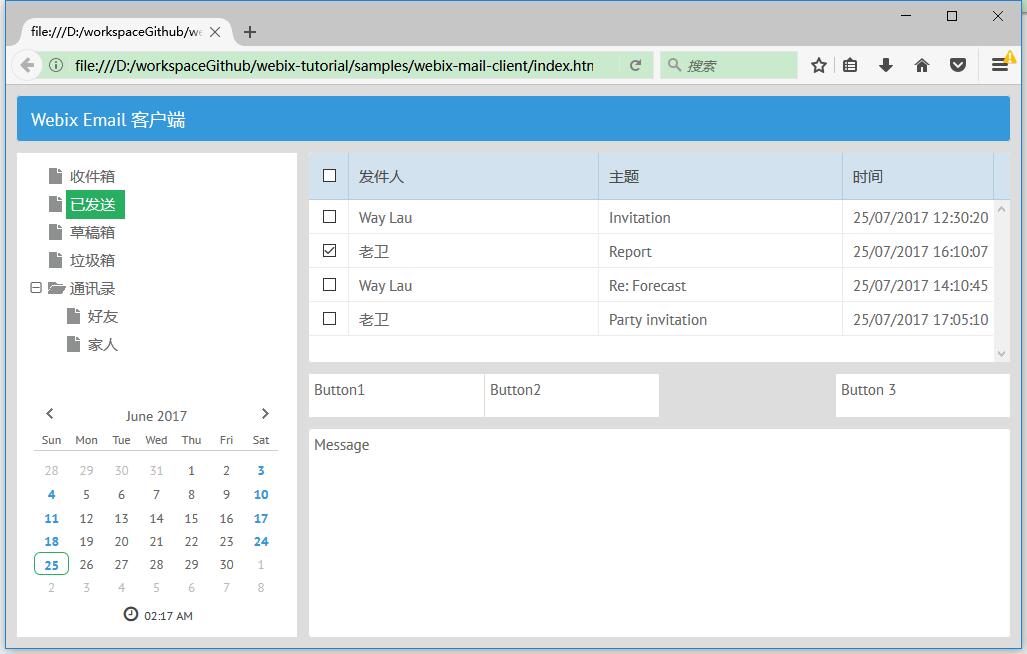
事件处理
事件,让组件具备交互功能:
...
// 绑定事件
$$("my_datatable").bind($$("my_tree"),function(obj,filter){
    return obj.folder == filter.id;
});

// 选中第一个节点
$$("my_tree").select(1);
...
其中:
- “my_datatable” 为
datatable组件的 id。绑定了”my_tree”的点击事件; $$("my_tree").select(1)意味着树节点会选中第一个节点。
最终效果如下:
按钮实现
按钮实现如下:
...
{
    height: 45, cols: [
        {
            view:"button",
            label:"回复",
            width: 95
        },
        {
            view:"button",
            label:"创建",
            width: 95
        },
        {},
        {
            view:"button",
            label:"删除",
            width: 95
        }
    ]
},
...
其中:
- “my_datatable” 为
datatable组件的 id。绑定了”my_tree”的点击事件; $$("my_tree").select(1)意味着树节点会选中第一个节点。
最终效果如下:
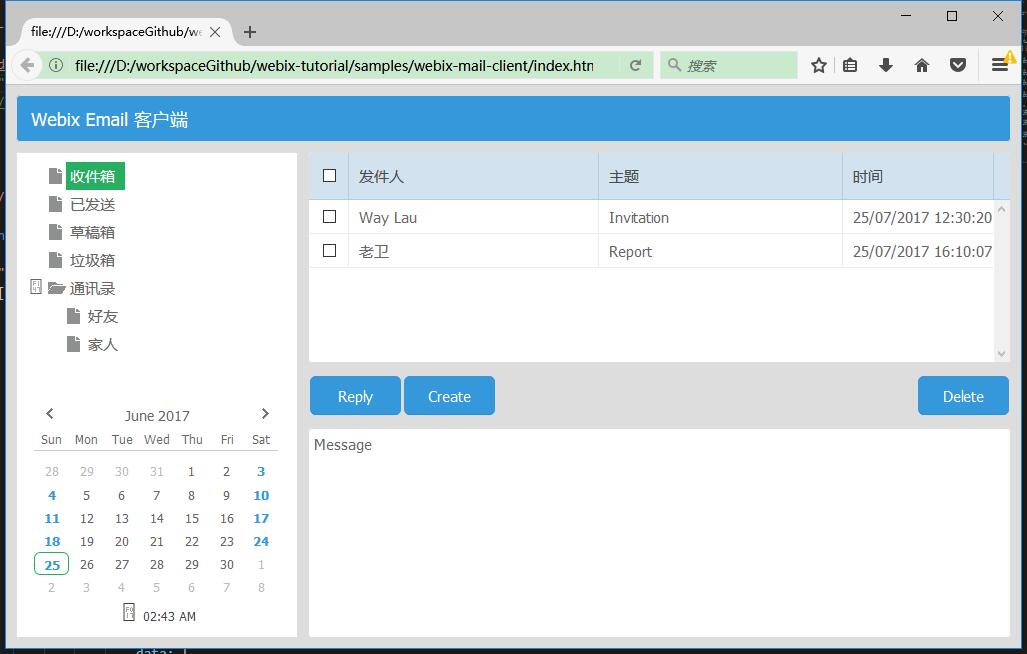
展示 Email 正文
展示 Email 正文实现如下:
...
{
    id:"details",
    template:"No message selected"
},
...
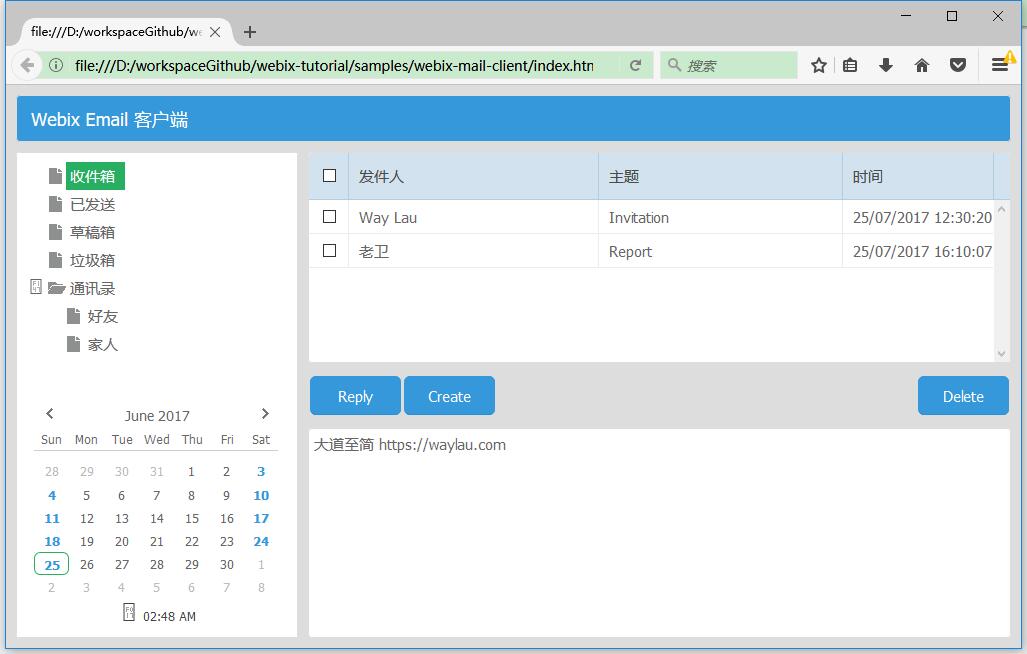
如果想显示文本,可以编写如下脚本:
var message = "大道至简  https://waylau.com";

$$("details").define("template",message);
$$("details").render();
最终效果如下:
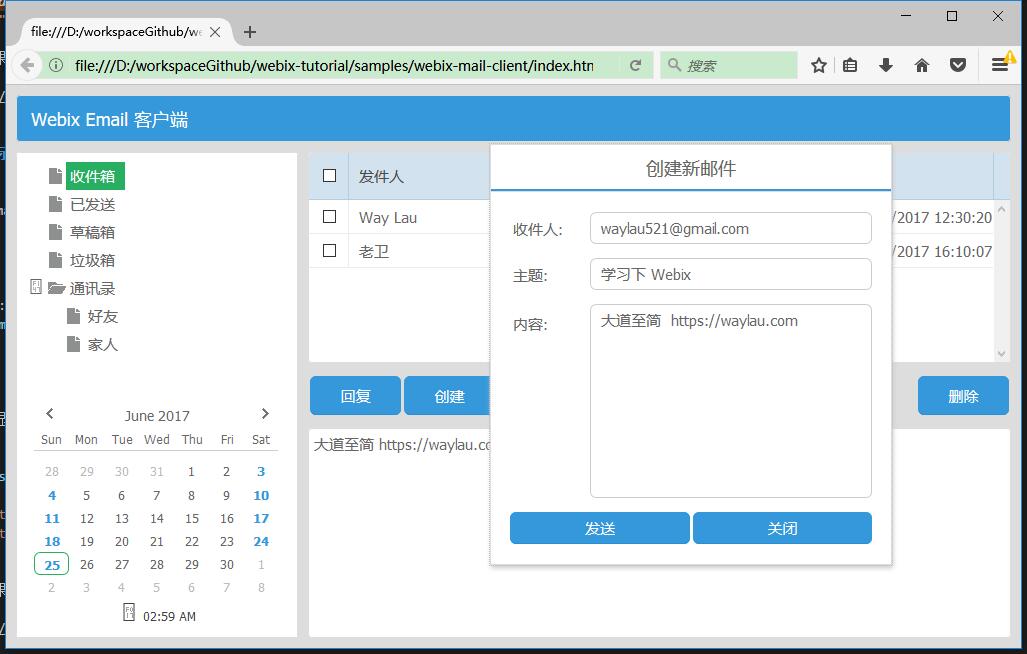
编辑窗口
发送邮件,我们需要有一个编辑窗口:
webix.ui({
    view:"window",
    move: true,
    id:"my_win",
    width:400,
    head:"创建新邮件",
    position: "center",
    body: {
        view:"form",
        borderless:true,
        elements: [
        { view:"text", label:'收件人:', name:"address" },
        { view:"text", label:'主题:', name:"subject" },
        { view:"textarea", height:200, label:"内容:", name:"message"},
        { cols: [
            { view:"button", value: "发送", },
            { view:"button", value: "关闭", click:("$$('my_win').hide();") }
        ]},
        ],
    }
});
然后在“创建”的按钮上,添加弹出窗口的事件:
...
{
    view:"button",
    label:"创建",
    width: 95,
    click:function(){
        $$("my_win").getBody().clear();
        $$("my_win").show();
    }
},
...
最终效果如下: